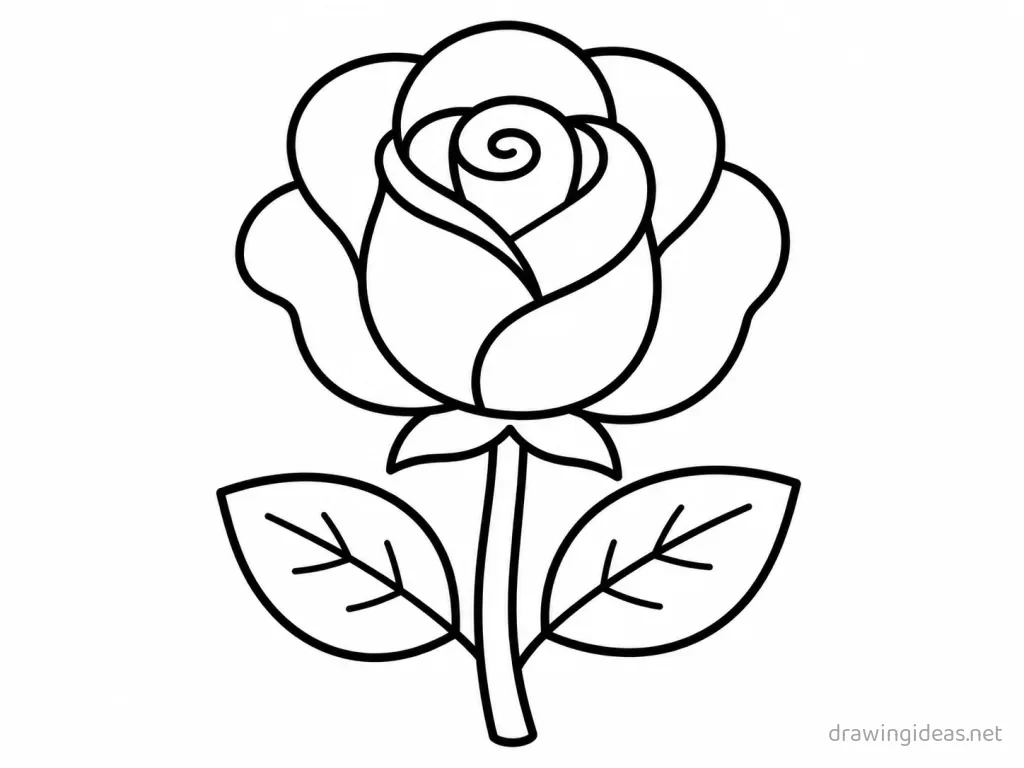
Easy Rose Drawing: Simple Step-by-Step for Beginners
This is the simplest way to draw a rose — built from a spiral inside an egg shape, with every step small enough for total beginners and kids. No shading skills, no special supplies: a pencil, an eraser and five spare minutes get you a finished, recognizable rose drawing.
- Difficulty Easy
- Time ~12 min
- Tools Pencil, eraser, paper
- Starts with a spiral inside an egg shape
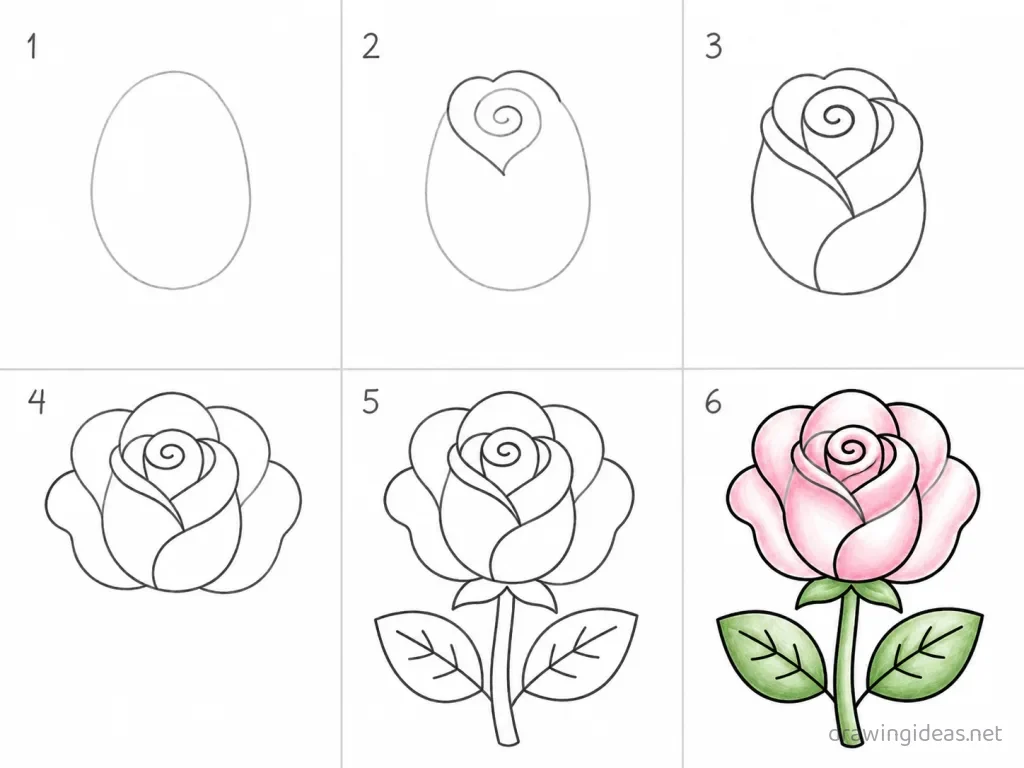
How to Draw an Easy Rose, Step by Step
-
Draw an egg shape
Start with a slightly narrow egg shape — this is the rose bud seen from a three-quarter angle. Keep the lines loose — wobbles are fine at this stage.
-
Add the spiral heart
Inside the top of the egg, draw a loose spiral like a cinnamon roll. Simpler is better here: one confident line beats three careful ones.
-
Wrap the inner petals
Draw two or three curved lines that hug the spiral, each starting and ending on the egg outline — like wrapping the bud in ribbons. If it looks off, adjust the big shape rather than adding detail.
-
Open the outer petals
Add larger petals that peel away from the egg, curving outward and down, with slightly pointed tips folding back. A rough version of this step is good enough — keep moving.
-
Add the sepals and stem
Under the bloom, draw three spiky leaf-like sepals pointing down, then a stem with a thorn or two and one serrated leaf. Draw this bigger than feels natural; big shapes are easier to control.
-
Shade the depths
Darken the spaces where petals overlap and inside the spiral. Done is better than perfect — finish the step and move on.
Want the full detailed version?
The complete Rose drawing tutorial covers proportions, texture and shading in depth.
Full Rose Drawing Tutorial →Easy Rose Drawing Ideas
A bee or butterfly visiting your rose
One tiny pollinator turns a plant study into a scene.
Pressed-flower style flat rose
Draw it perfectly flat and symmetrical like a pressed specimen, with a handwritten label beneath.
Rose in a simple vase
Add a basic vessel and you've turned a flower doodle into a still life.
A single rose study
One bloom, centered, drawn slowly from life or photo — the classic botanical exercise that always ends frameable.
A rose wreath
Repeat small versions in a circle guideline — the highest-value use of one flower you've learned.
A rose growth cycle strip
Bud, half-open, full bloom in three panels — repetition with a story built in.
Easy Drawing Tips
- Finish it even if it looks wrong at step 3. Every finished easy drawing teaches the whole sequence; abandoned perfect starts teach nothing.
- Draw big. Beginners instinctively draw tiny, and tiny drawings are actually harder — small curves demand more finger control than big arm strokes. Fill at least half the page.
- Trace your own drawing once. Tracing something you already drew builds muscle memory twice as fast as starting over.
FAQ
What is the easiest way to draw a rose?
Start with a spiral inside an egg shape and keep every line light until the shape looks right — that's the entire method above. Most beginners get a recognizable rose drawing on the first try because each step is one simple move.
Can kids follow this rose drawing tutorial?
Yes — this version was written for young artists: big forgiving shapes, no shading, no fine details. Ages 5-6 and up can usually follow along with a little help reading the steps.
How long does the easy version take?
About five minutes for the basic drawing — roughly half the time of the full tutorial. Adding color takes another few minutes.