Easy Flower Drawing: Simple Step-by-Step for Beginners
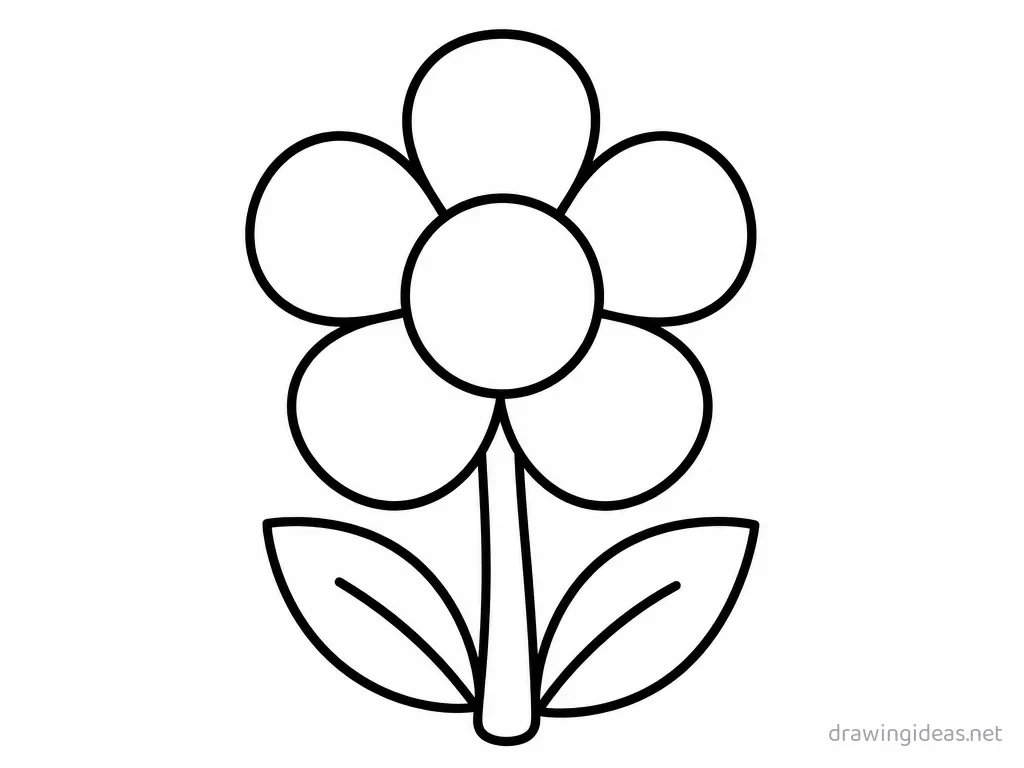
This is the simplest way to draw a flower — built from a small circle for the center and simple ovals for petals, with every step small enough for total beginners and kids. No shading skills, no special supplies: a pencil, an eraser and five spare minutes get you a finished, recognizable flower drawing.
- Difficulty Easy
- Time ~6 min
- Tools Pencil, eraser, paper
- Starts with a small circle for the center and simple ovals for petals
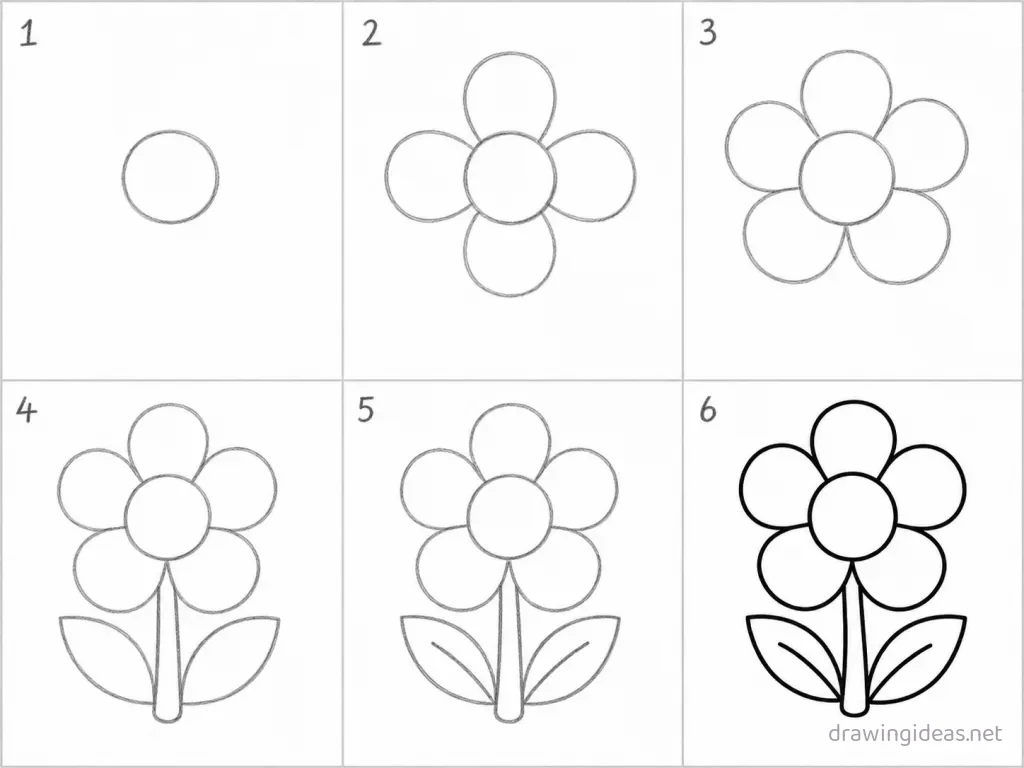
How to Draw an Easy Flower, Step by Step
-
Draw the center
Start with a small circle slightly above the middle of your paper. Keep the lines loose — wobbles are fine at this stage.
-
Add the first four petals
Draw four rounded petals at the top, bottom, left, and right of the circle, like a plus sign. Simpler is better here: one confident line beats three careful ones.
-
Fill the gaps with more petals
Add four more petals in the diagonal gaps so you have eight in total. If it looks off, adjust the big shape rather than adding detail.
-
Draw the stem and leaves
Pull two gently curving parallel lines down from the flower head, then add one or two simple leaf shapes — a curved line out and back to the stem. A rough version of this step is good enough — keep moving.
-
Add detail lines
Draw a smaller circle inside the center, dot it with seeds, and add one short vein line down the middle of each petal and leaf. Draw this bigger than feels natural; big shapes are easier to control.
-
Clean up and shade
Erase overlapping construction lines, darken your final outline, and shade lightly where petals meet the center for instant depth. Done is better than perfect — finish the step and move on.
Want the full detailed version?
The complete Flower drawing tutorial covers proportions, texture and shading in depth.
Full Flower Drawing Tutorial →Easy Flower Drawing Ideas
A bee or butterfly visiting your flower
One tiny pollinator turns a plant study into a scene.
Pressed-flower style flat flower
Draw it perfectly flat and symmetrical like a pressed specimen, with a handwritten label beneath.
A flower border or corner piece
Grow the flower along a page edge or corner — perfect for journals, cards, and letters.
A flower wreath
Repeat small versions in a circle guideline — the highest-value use of one flower you've learned.
Line-art flower tattoo design
Single-weight clean outline, no shading — minimalist flash style.
A flower growth cycle strip
Bud, half-open, full bloom in three panels — repetition with a story built in.
Easy Drawing Tips
- Finish it even if it looks wrong at step 3. Every finished easy drawing teaches the whole sequence; abandoned perfect starts teach nothing.
- Use a light pencil for the shape stage and press harder only on the final outline — being able to erase guide lines is what makes the simple method forgiving.
- Draw big. Beginners instinctively draw tiny, and tiny drawings are actually harder — small curves demand more finger control than big arm strokes. Fill at least half the page.
FAQ
What is the easiest way to draw a flower?
Start with a small circle for the center and simple ovals for petals and keep every line light until the shape looks right — that's the entire method above. Most beginners get a recognizable flower drawing on the first try because each step is one simple move.
Can kids follow this flower drawing tutorial?
Yes — this version was written for young artists: big forgiving shapes, no shading, no fine details. Ages 5-6 and up can usually follow along with a little help reading the steps.
How long does the easy version take?
About five minutes for the basic drawing — roughly half the time of the full tutorial. Adding color takes another few minutes.