Converse Drawing: Step-by-Step Tutorial & Easy Ideas
Want to draw a converse that actually looks right? Start with the garment’s flat silhouette and build from there. This page covers the full process — six steps from first line to finished drawing — followed by converse drawing ideas in every style: easy, cute, realistic, and a few you probably haven't tried.
- Difficulty Medium
- Time ~15 min
- Tools Pencil, eraser, paper
- Starts with the garment’s flat silhouette
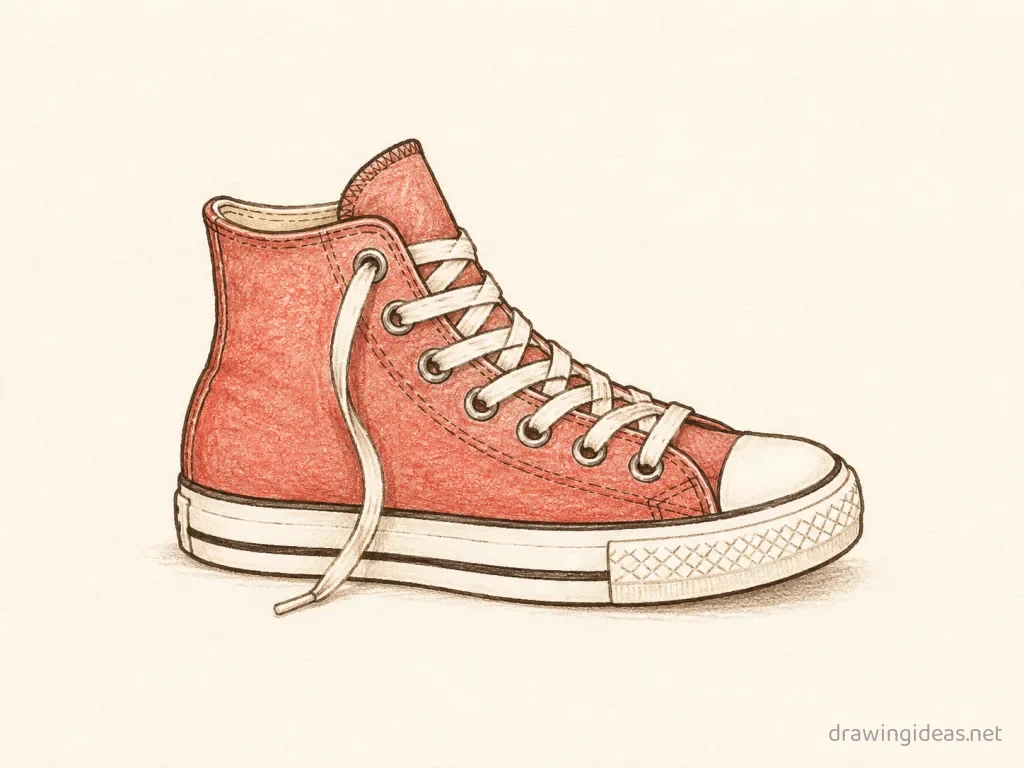
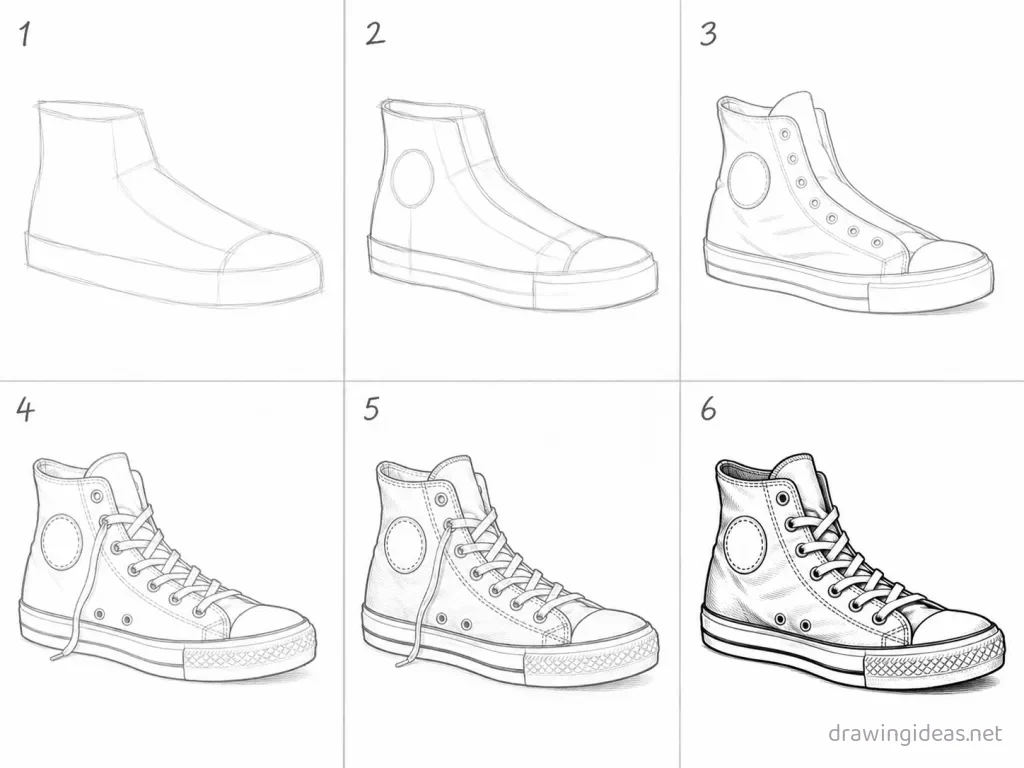
How to Draw a Converse Step by Step
-
Draw the base silhouette
Block the converse as if worn by an invisible body — sketch the underlying body curve lightly first, because clothes are shaped by what's inside them.
-
Define the structure
Add the structural lines: seams, waistbands, collars, soles — the engineered parts that hold the garment's shape.
-
Drape the fabric
Draw fold lines where fabric compresses (joints, gathers) and let it fall smooth elsewhere. Folds radiate from tension points.
-
Add the functional details
Buttons, laces, zippers, stitching — drawn with consistent spacing. These small regular details make fashion drawings look professional.
-
Texture the material
Suggest the fabric: soft strokes for knits, crisp lines for denim, gloss highlights for leather. Texture a few zones, not every inch.
-
Shade the folds
Shade inside each fold and under overlaps, keeping the light consistent. Fabric depth comes almost entirely from fold shadows.
Converse Drawing Ideas to Try Next
Once the basic converse clicks, run it through these variations — each one practices a different skill while staying on a subject you already know.
-
A four-season converse lineup
The same garment styled four ways in four panels.
-
Converse on a clothesline
Hang it with two pins on a sagging line — motion and setting from one curve.
-
A patched and embroidered converse
Cover it with patches, pins, and stitching details — personality through decoration.
-
A converse flat-lay design sheet
Draw it laid flat like a shop listing — the fashion-design standard that's easier than on-body.
Tips for Better Converse Drawings
- Draw the body’s curve lightly under the garment first; clothes are shaped by what’s inside them.
- Folds radiate from tension points (joints, seams, gathers) — random folds look like wrinkled paper, radiating folds look like fabric.
Not feeling the converse today?
Let the generator pick your next subject — filtered by mood and difficulty.
🎲 Random Drawing GeneratorConverse Drawing FAQ
What is the easiest way to draw a converse?
Start with the garment’s flat silhouette, keeping your lines light. Refine the outline, add the defining details, then erase the construction shapes. The six-step method above breaks this down — most people get a recognizable converse on their very first try with it.
How long should it take to draw a converse?
A simple converse drawing takes about 15 minutes following this tutorial. A quick doodle version can be done in two or three minutes, while a detailed, fully-shaded study might take an hour. Speed comes with repetition — the second attempt is always faster than the first.
What do I need to draw a converse?
Just a pencil, an eraser, and any paper. An HB pencil for construction lines and a 2B for final outlines is a nice upgrade, and colored pencils or markers finish it off — but nothing on this page requires special supplies.
Is a converse easy to draw for beginners?
Yes — the converse is very manageable once you use construction shapes, and this method was written for first-timers. Kids can follow the same steps; just expect wobblier lines and more charm.