Skeleton Hand Drawing: Step-by-Step Tutorial & Easy Ideas
Learning how to draw a skeleton hand is easier than it looks — the whole thing starts with a light proportion framework. This guide walks you through a skeleton hand drawing in six clear steps, then hands you a set of skeleton hand drawing ideas to keep going: easy versions for beginners, cute and cartoon takes, and variations worth sketching when you want more.
- Difficulty Hard
- Time ~25 min
- Tools Pencil, eraser, paper
- Starts with a light proportion framework
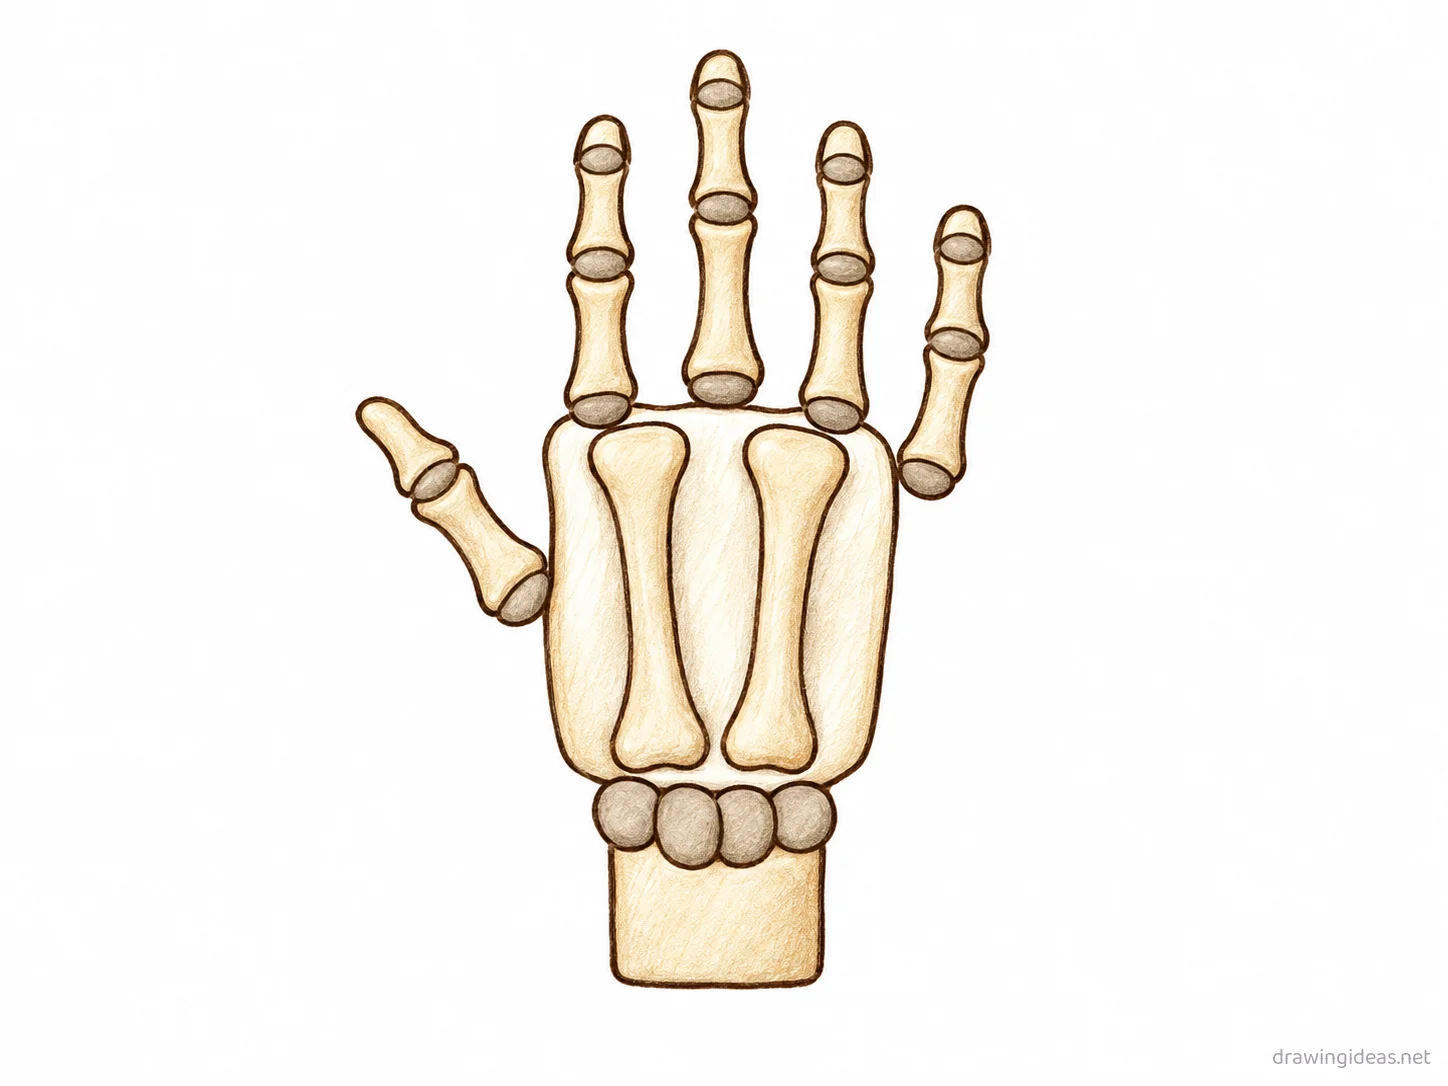
How to Draw a Skeleton Hand Step by Step
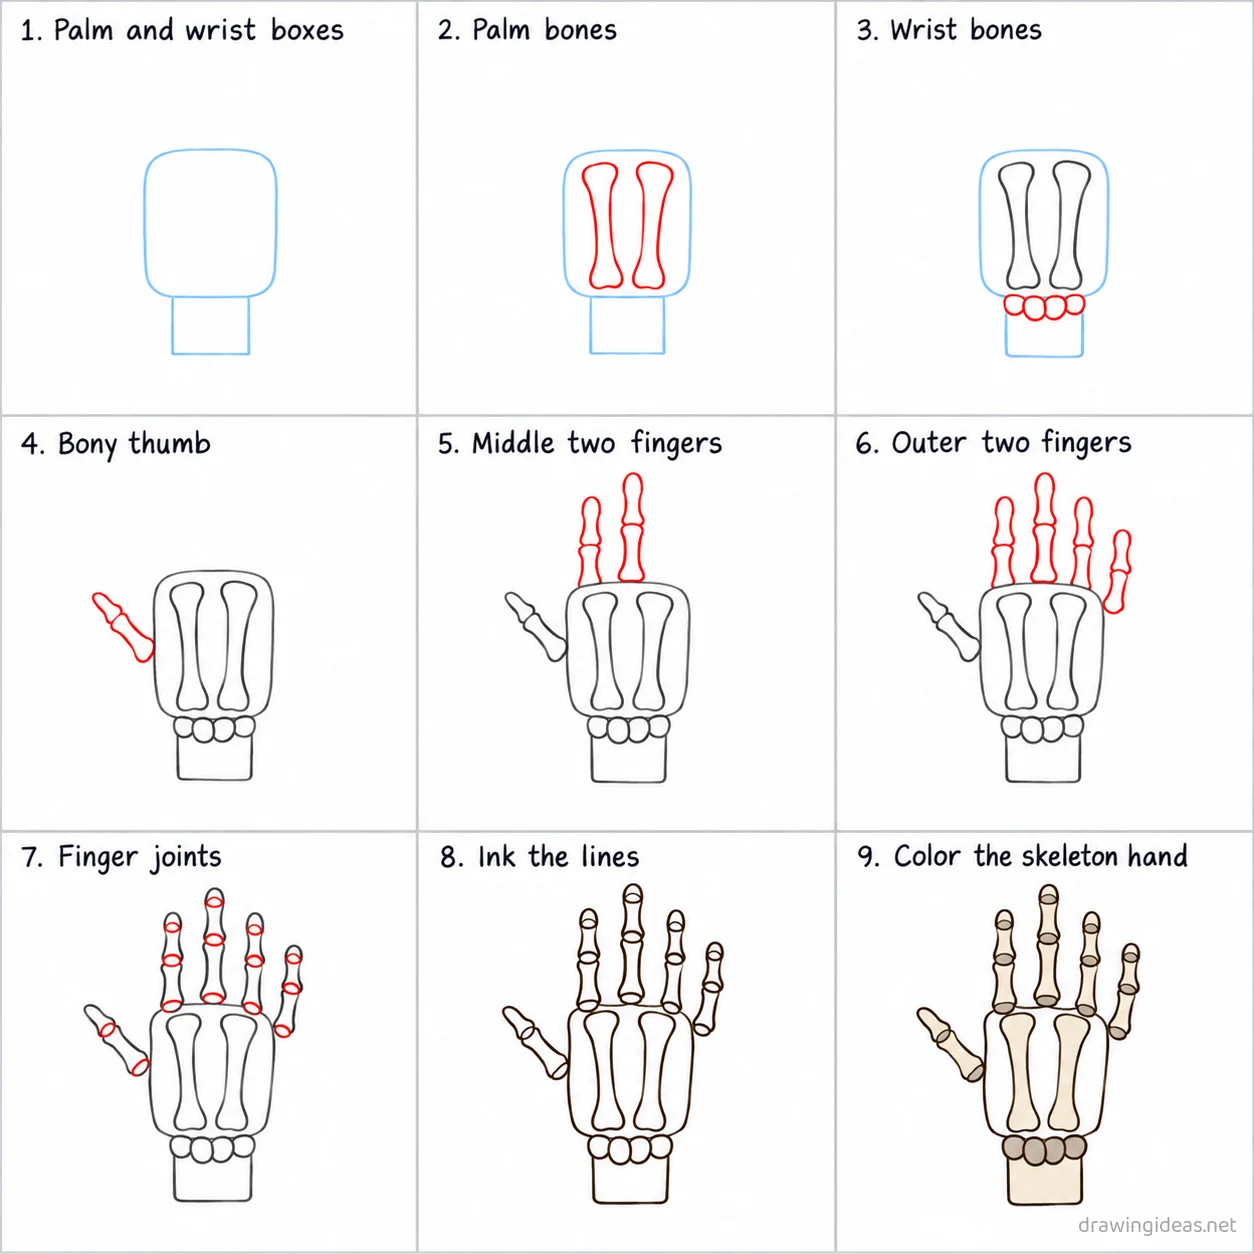
Step 1 of 9
Palm and wrist boxes
Draw a light rounded rectangle in the middle of the page for the palm, then a narrower light rectangle below it for the wrist.
-
Palm and wrist boxes
Draw a light rounded rectangle in the middle of the page for the palm, then a narrower light rectangle below it for the wrist.
-
Palm bones
Trace the palm rectangle into an outline showing two long bone shapes side by side.
-
Wrist bones
Trace the wrist rectangle into an outline with a row of small round wrist bone bumps along the top.
-
Bony thumb
Add a thumb made of two short bone segments angled outward from the left side of the palm.
-
Middle two fingers
Draw the index and middle fingers rising from the top of the palm, each made of three stacked bone segments, with the middle finger tallest.
-
Outer two fingers
Add the ring and pinky fingers rising from the palm, each made of three stacked bone segments, with the pinky shortest.
-
Finger joints
Add small round joint circles at each bone connection point on every finger and the thumb.
-
Ink the lines
Go over every kept line with dark ink, then erase the light palm and wrist boxes.
-
Color the skeleton hand
Fill all the bones off-white and the joint circles a slightly darker gray.
Skeleton Hand Drawing Ideas to Try Next
Once the basic skeleton hand clicks, run it through these variations — each one practices a different skill while staying on a subject you already know.
-
Hands holding something small
A mug, a phone, a flower — drawing hands WITH objects is easier than empty hands, and endlessly useful.
-
A cozy bundled-up figure
Big coat, big scarf, small visible face — winter clothing hides anatomy while you practice everything else.
-
A back-view skeleton hand
No face required: hair, shoulders, and posture carry everything. The most confidence-building people drawing there is.
-
A gesture-pose minute study
Set a timer for 60 seconds and capture just the motion line and weight — repeat five times, keep the best.
-
Skeleton Hand in profile silhouette
One side-view outline filled solid black — profile practice with a dramatic result.
Tips for Better Skeleton Hand Drawings
- Draw the spaces between features, not just the features. The distance from nose to mouth matters more than the nose or the mouth.
- Eyes sit at the vertical middle of the head — everyone places them too high at first. Measure it once on any photo and you’ll never unsee it.
Not feeling the skeleton hand today?
Let the generator pick your next subject — filtered by mood and difficulty.
🎲 Random Drawing GeneratorSkeleton Hand Drawing FAQ
How do you draw a skeleton hand easily?
Start with a light proportion framework, keeping your lines light. Refine the outline, add the defining details, then erase the construction shapes. The nine-step method above breaks this down — most people get a recognizable skeleton hand on their very first try with it.
How long should it take to draw a skeleton hand?
A simple skeleton hand drawing takes about 25 minutes following this tutorial. A quick doodle version can be done in two or three minutes, while a detailed, fully-shaded study might take an hour. Speed comes with repetition — the second attempt is always faster than the first.
What supplies do I need for skeleton hand drawings?
Just a pencil, an eraser, and any paper. An HB pencil for construction lines and a 2B for final outlines is a nice upgrade, and colored pencils or markers finish it off — but nothing on this page requires special supplies.
Why is drawing a skeleton hand so hard?
Skeleton Hand drawings usually go wrong at the proportion stage, not the detail stage. The fix is to spend more time on the basic shapes (steps 1–2) and check them before adding anything else — and use the tip above, which addresses the single most common skeleton hand mistake.