Igloo Drawing: Step-by-Step Tutorial & Easy Ideas
Want to draw an igloo that actually looks right? Start with stacked rectangles with a roof shape and build from there. This page covers the full process — nine steps from first line to finished drawing — followed by igloo drawing ideas in every style: easy, cute, realistic, and a few you probably haven't tried.
- Difficulty Medium
- Time ~18 min
- Tools Pencil, eraser, paper
- Starts with stacked rectangles with a roof shape
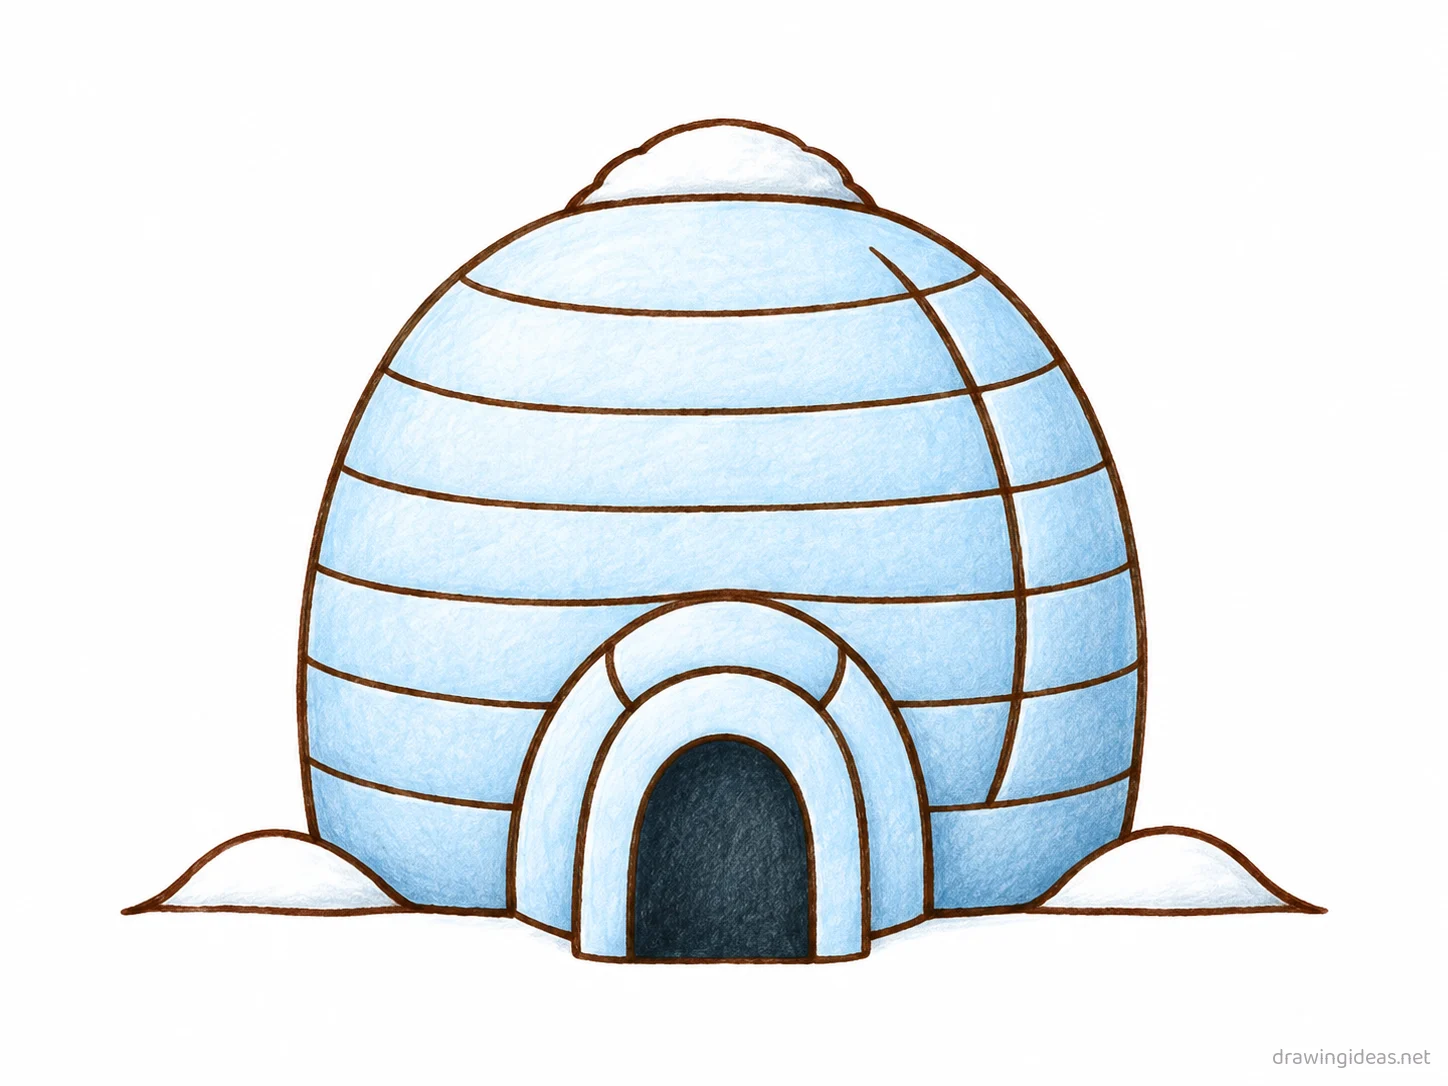
How to Draw an Igloo Step by Step
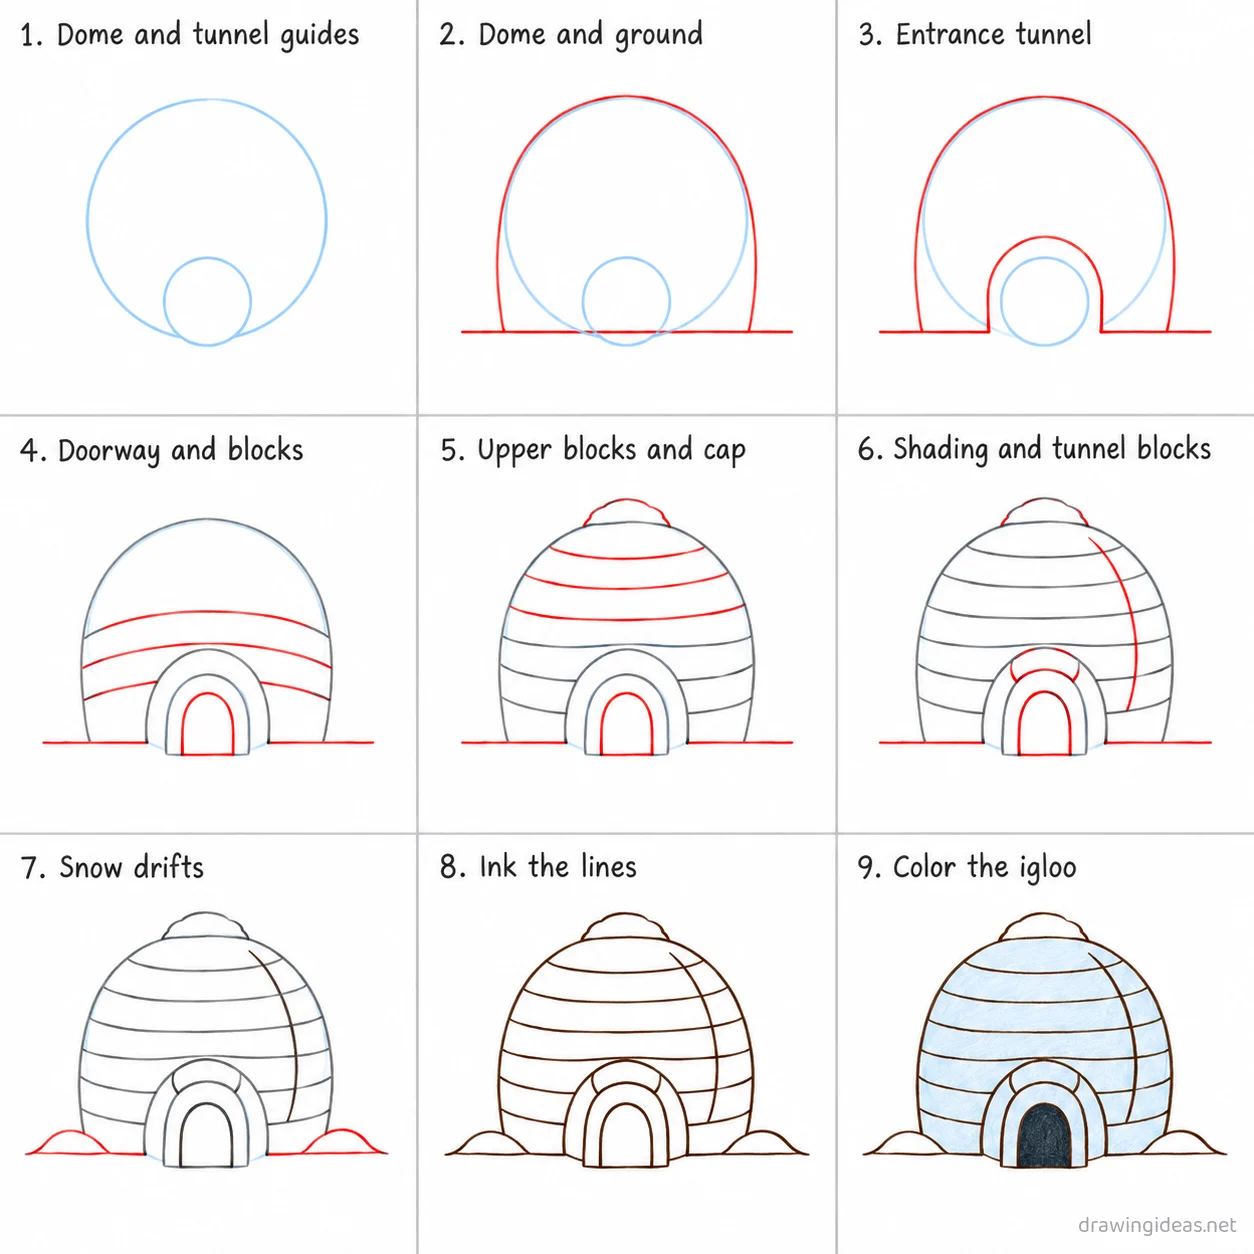
Step 1 of 9
Dome and tunnel guides
Draw a large light circle for the dome in the middle of the page, then a small light circle in front of it near the bottom for the tunnel.
-
Dome and tunnel guides
Draw a large light circle for the dome in the middle of the page, then a small light circle in front of it near the bottom for the tunnel.
-
Dome and ground
Trace an arched dome shape on the large circle, flattening at the sides, then draw a straight ground line beneath it.
-
Entrance tunnel
Trace a rounded tunnel arch on the small circle, sitting on the ground line in front of the dome.
-
Doorway and blocks
Add a smaller dark doorway opening inside the tunnel arch, then draw three curved lines across the lower dome for ice blocks.
-
Upper blocks and cap
Add three more curved ice block lines across the upper dome, then a small rounded snow mound on top.
-
Shading and tunnel blocks
Add one curved shading line down the right side of the dome and two short block lines on the tunnel arch.
-
Snow drifts
Add a small rounded snow drift mound on the ground on each side of the igloo.
-
Ink the lines
Go over every kept line with dark ink, then erase the light dome and tunnel circle guides.
-
Color the igloo
Fill the dome and tunnel walls pale blue-white, the doorway dark navy, and the snow cap and drifts pure white.
Igloo Drawing Ideas to Try Next
Once the basic igloo clicks, run it through these variations — each one practices a different skill while staying on a subject you already know.
-
Igloo reflected in water
The structure above a wavy mirrored copy below — draw the reflection with broken horizontal lines.
-
Isometric mini igloo
Draw it at the video-game 30° angle, clean lines, flat colors — the most satisfying architectural style to learn.
-
A crooked storybook igloo
Let every line lean and bulge on purpose — fairy-tale architecture is anatomy-proof.
-
A igloo floating on an island
Draw it on a chunk of floating earth with roots dangling below — the classic fantasy vignette.
-
Igloo at night with lit windows
Dark silhouette, warm yellow windows — two tones that do all the storytelling.
Tips for Better Igloo Drawings
- Windows and doors align in rows and columns — builders use levels. Misaligned openings are the #1 tell of a rushed building drawing.
- Add one scale reference (a figure, a door, a tree) — buildings only feel big next to something small.
Not feeling the igloo today?
Let the generator pick your next subject — filtered by mood and difficulty.
🎲 Random Drawing GeneratorIgloo Drawing FAQ
How do you draw an igloo easily?
Start with stacked rectangles with a roof shape, keeping your lines light. Refine the outline, add the defining details, then erase the construction shapes. The nine-step method above breaks this down — most people get a recognizable igloo on their very first try with it.
How long does an igloo drawing take?
A simple igloo drawing takes about 18 minutes following this tutorial. A quick doodle version can be done in two or three minutes, while a detailed, fully-shaded study might take an hour. Speed comes with repetition — the second attempt is always faster than the first.
What supplies do I need for igloo drawings?
Just a pencil, an eraser, and any paper. An HB pencil for construction lines and a 2B for final outlines is a nice upgrade, and colored pencils or markers finish it off — but nothing on this page requires special supplies.
Can kids draw an igloo?
Yes — the igloo is very manageable once you use construction shapes, and this method was written for first-timers. Kids can follow the same steps; just expect wobblier lines and more charm.