Graveyard Drawing: Step-by-Step Tutorial & Easy Ideas
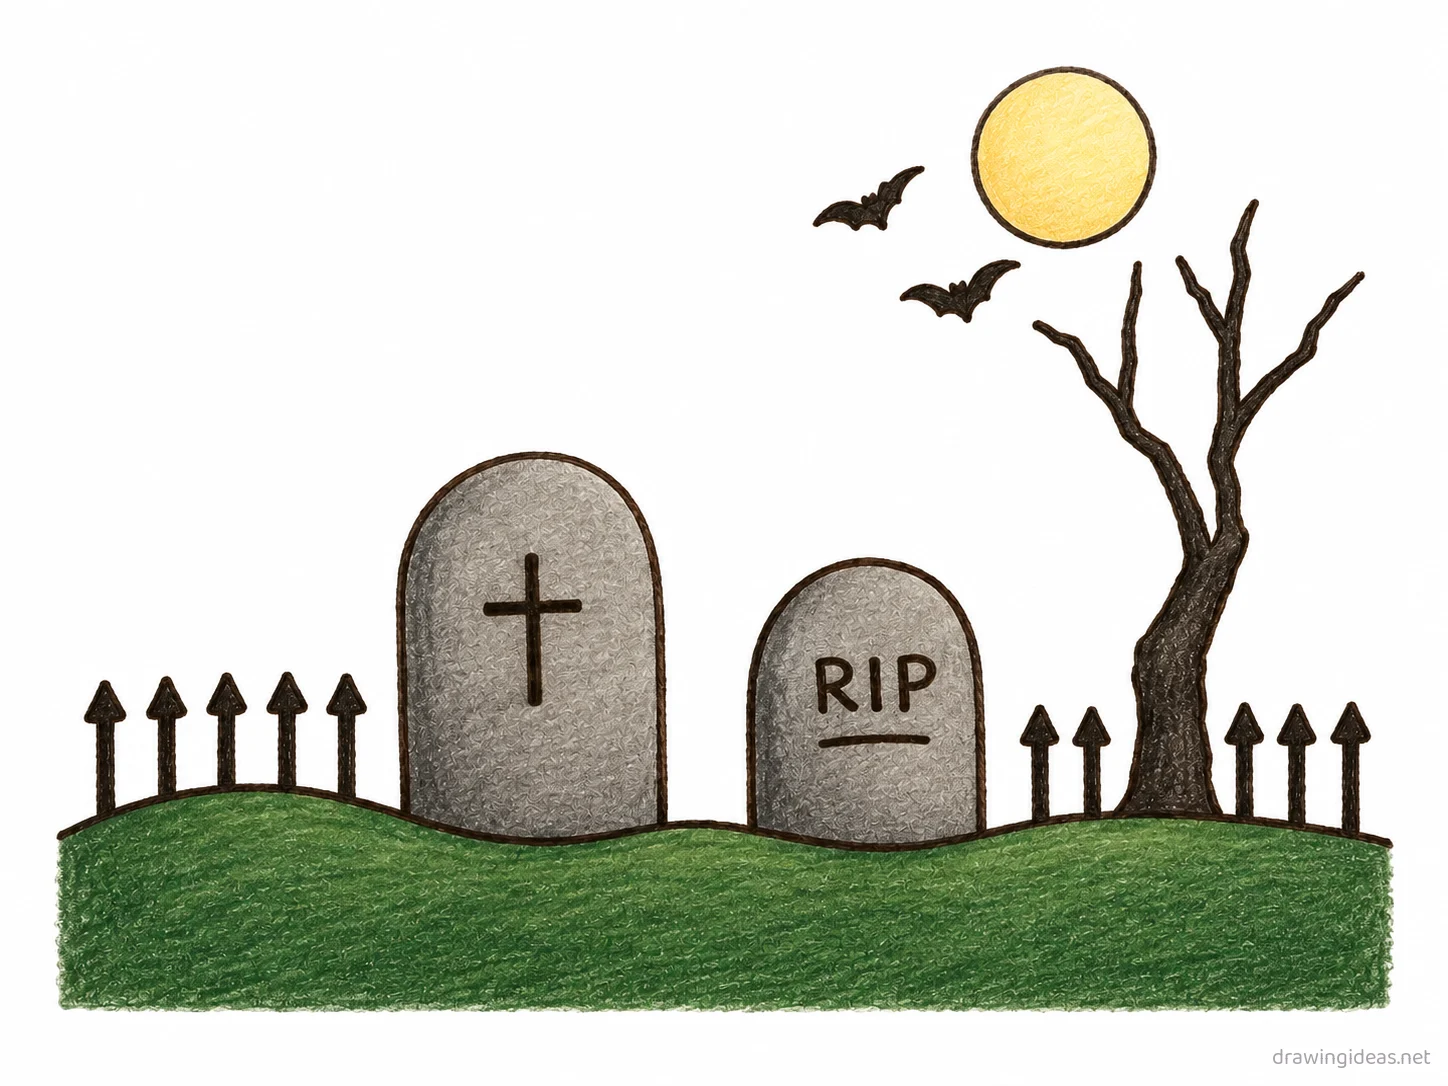
Every good graveyard drawing starts the same way: two or three simple geometric shapes, refined step by step into a finished piece. Below you'll find a complete step-by-step tutorial you can follow with any pencil and paper, plus easy graveyard drawing ideas — from quick five-minute doodles to more detailed studies.
- Difficulty Easy
- Time ~12 min
- Tools Pencil, eraser, paper
- Starts with two or three simple geometric shapes
How to Draw a Graveyard Step by Step
Step 1 of 9
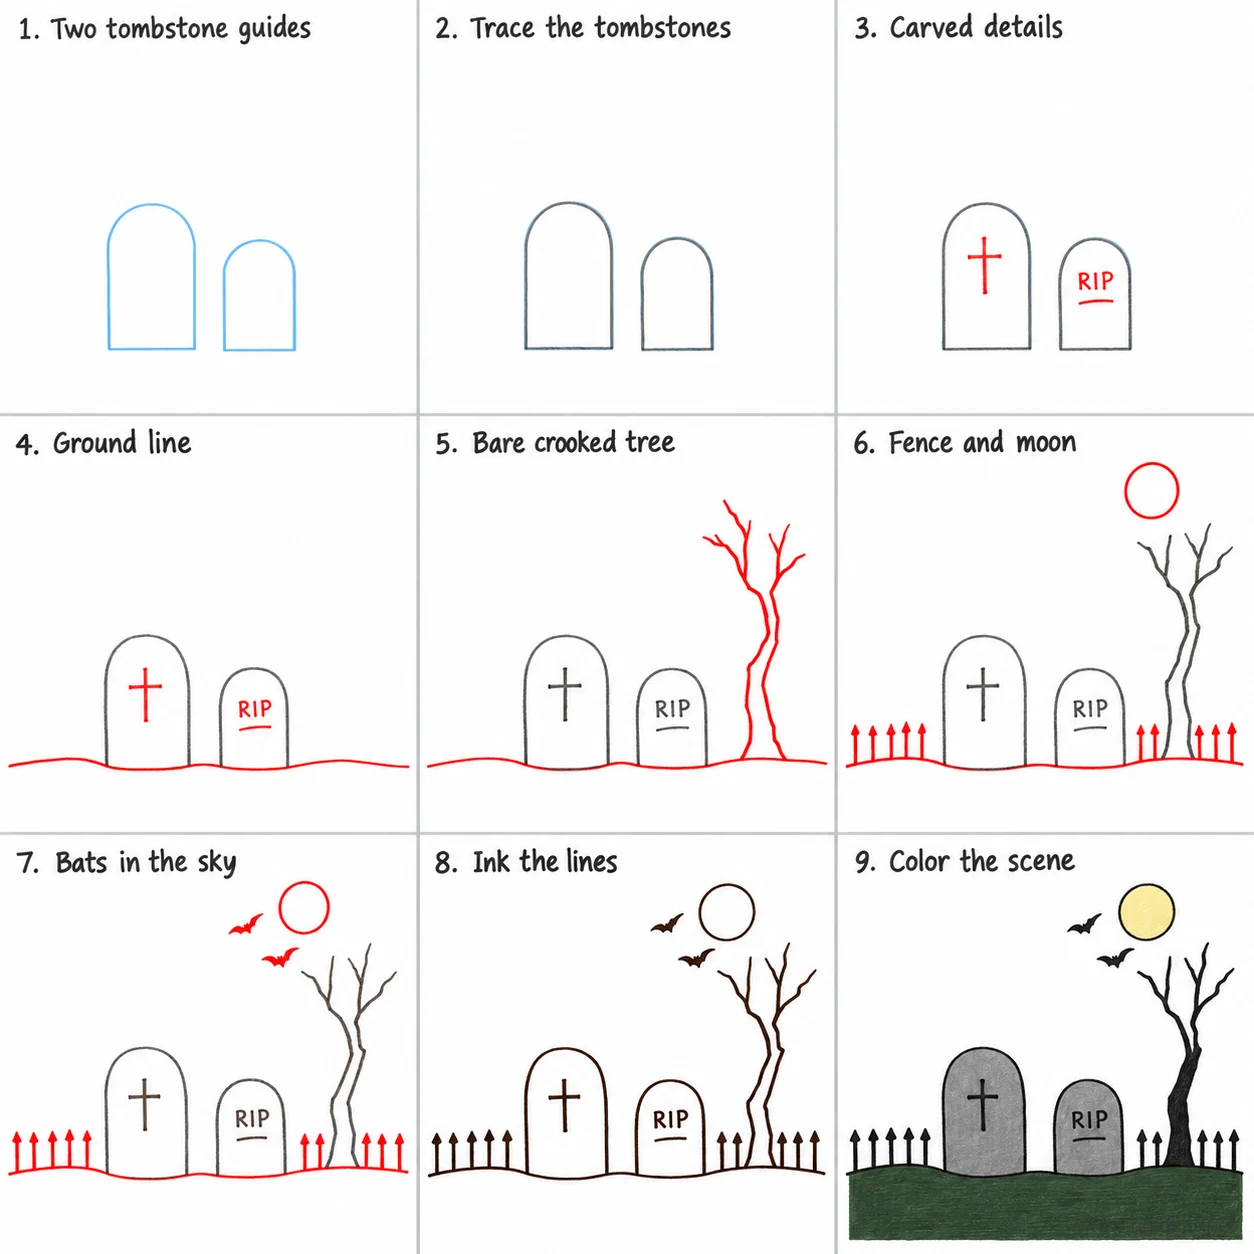
Two tombstone guides
Draw two light rounded-top rectangles side by side in the lower middle of the page, the right one smaller than the left.
-
Two tombstone guides
Draw two light rounded-top rectangles side by side in the lower middle of the page, the right one smaller than the left.
-
Trace the tombstones
Trace each guide into a rounded-top tombstone outline.
-
Carved details
Add a simple carved cross on the left tombstone and a short carved line on the right tombstone.
-
Ground line
Draw a gently rolling ground line across the whole width of the page, touching the base of each tombstone.
-
Bare crooked tree
Add a crooked bare tree on the right side of the scene, trunk splitting into a few thin bare branches near the top.
-
Fence and moon
Add a low fence of evenly spaced pointed posts along the ground line, then a full round moon in the upper right sky.
-
Bats in the sky
Add two small bat silhouettes flying near the moon.
-
Ink the lines
Go over every kept line with dark ink, then erase the two light tombstone guides.
-
Color the scene
Fill the tombstones gray, the ground dark green, the tree and fence black, the moon pale yellow, and the bats black.
Graveyard Drawing Ideas to Try Next
Once the basic graveyard clicks, run it through these variations — each one practices a different skill while staying on a subject you already know.
-
A graveyard greeting-card design
Center the graveyard, add a hand-lettered greeting and a simple border — an actually usable drawing.
-
A gift-tag sized mini graveyard
Design it small and simple enough to draw twenty times on gift tags.
-
A graveyard garland or pattern
Repeat small graveyard drawings along a string or in rows — decoration you can actually put up.
-
Kawaii graveyard with a face
The cute-ify formula: dot eyes, blush circles, tiny smile on your graveyard.
-
Graveyard in a snow globe
Draw a circle, put the graveyard inside, add a base and floating flakes — instant keepsake feel.
Tips for Better Graveyard Drawings
- Lean into the classic version first — holiday subjects work through instant recognition. Add your twist after the icon is solid.
- Holiday palettes are part of the drawing: commit to the expected colors boldly rather than muddying them.
Not feeling the graveyard today?
Let the generator pick your next subject — filtered by mood and difficulty.
🎲 Random Drawing GeneratorGraveyard Drawing FAQ
How do you draw a graveyard easily?
Start with two or three simple geometric shapes, keeping your lines light. Refine the outline, add the defining details, then erase the construction shapes. The nine-step method above breaks this down — most people get a recognizable graveyard on their very first try with it.
How long should it take to draw a graveyard?
A simple graveyard drawing takes about 12 minutes following this tutorial. A quick doodle version can be done in two or three minutes, while a detailed, fully-shaded study might take an hour. Speed comes with repetition — the second attempt is always faster than the first.
What do I need to draw a graveyard?
Just a pencil, an eraser, and any paper. An HB pencil for construction lines and a 2B for final outlines is a nice upgrade, and colored pencils or markers finish it off — but nothing on this page requires special supplies.
Can kids draw a graveyard?
Yes — the graveyard is one of the friendlier subjects for beginners, and this method was written for first-timers. Kids can follow the same steps; just expect wobblier lines and more charm.