Factory Drawing: Step-by-Step Tutorial & Easy Ideas
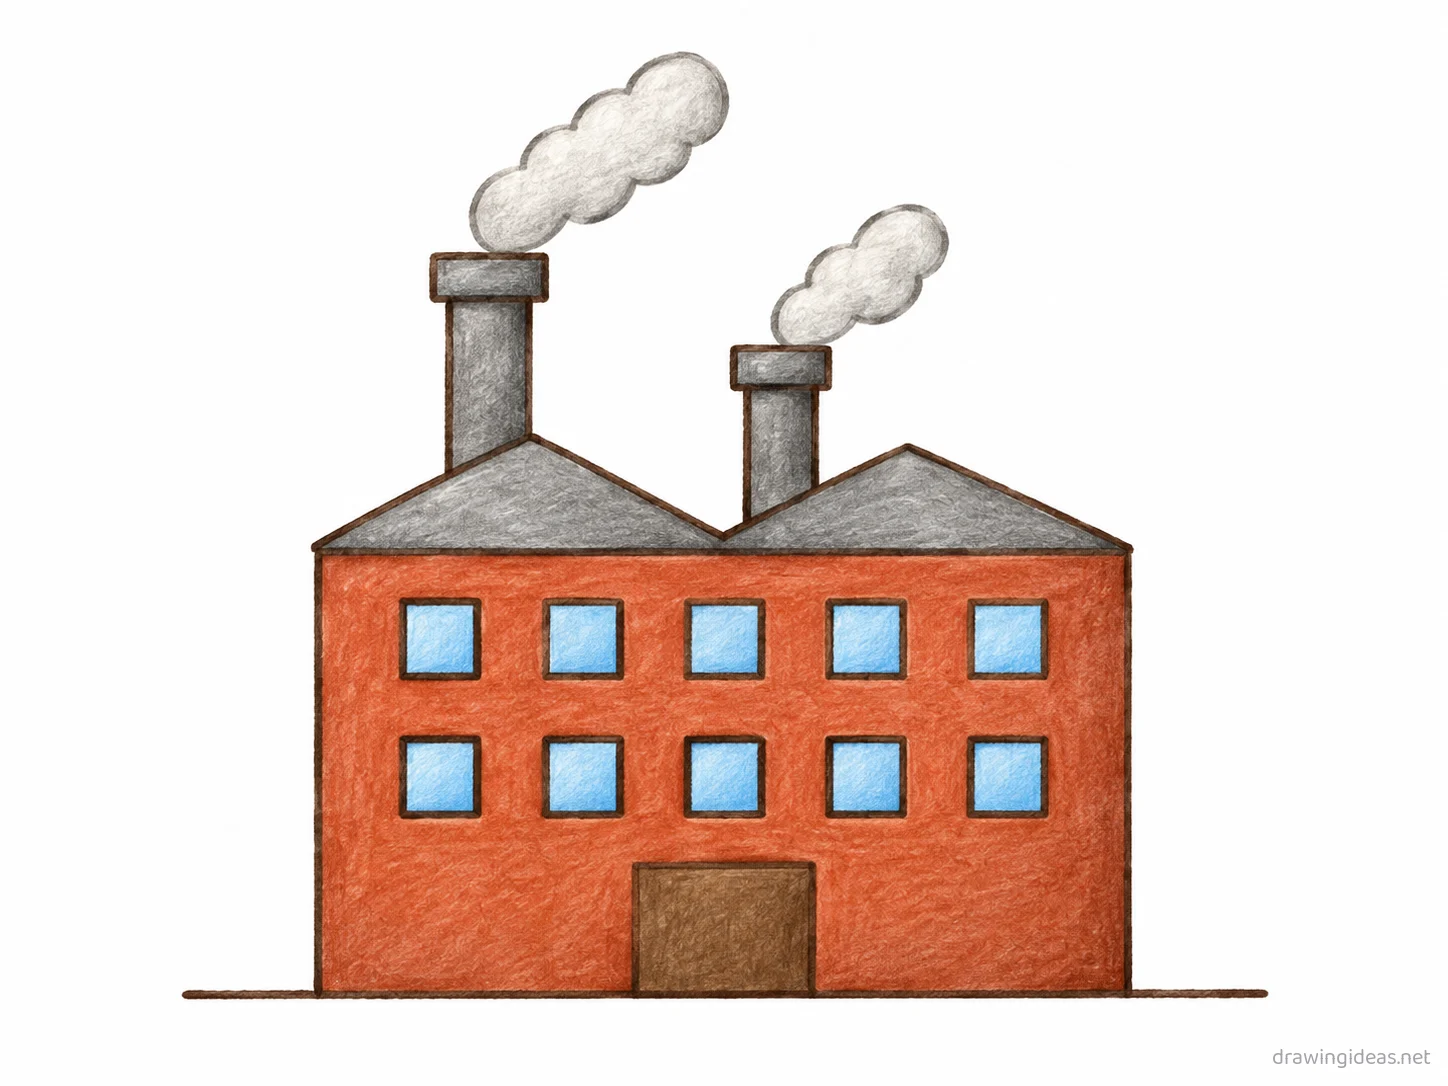
Every good factory drawing starts the same way: stacked rectangles with a roof shape, refined step by step into a finished piece. Below you'll find a complete step-by-step tutorial you can follow with any pencil and paper, plus easy factory drawing ideas — from quick five-minute doodles to more detailed studies.
- Difficulty Medium
- Time ~18 min
- Tools Pencil, eraser, paper
- Starts with stacked rectangles with a roof shape
How to Draw a Factory Step by Step
Step 1 of 9
Building and roof guides
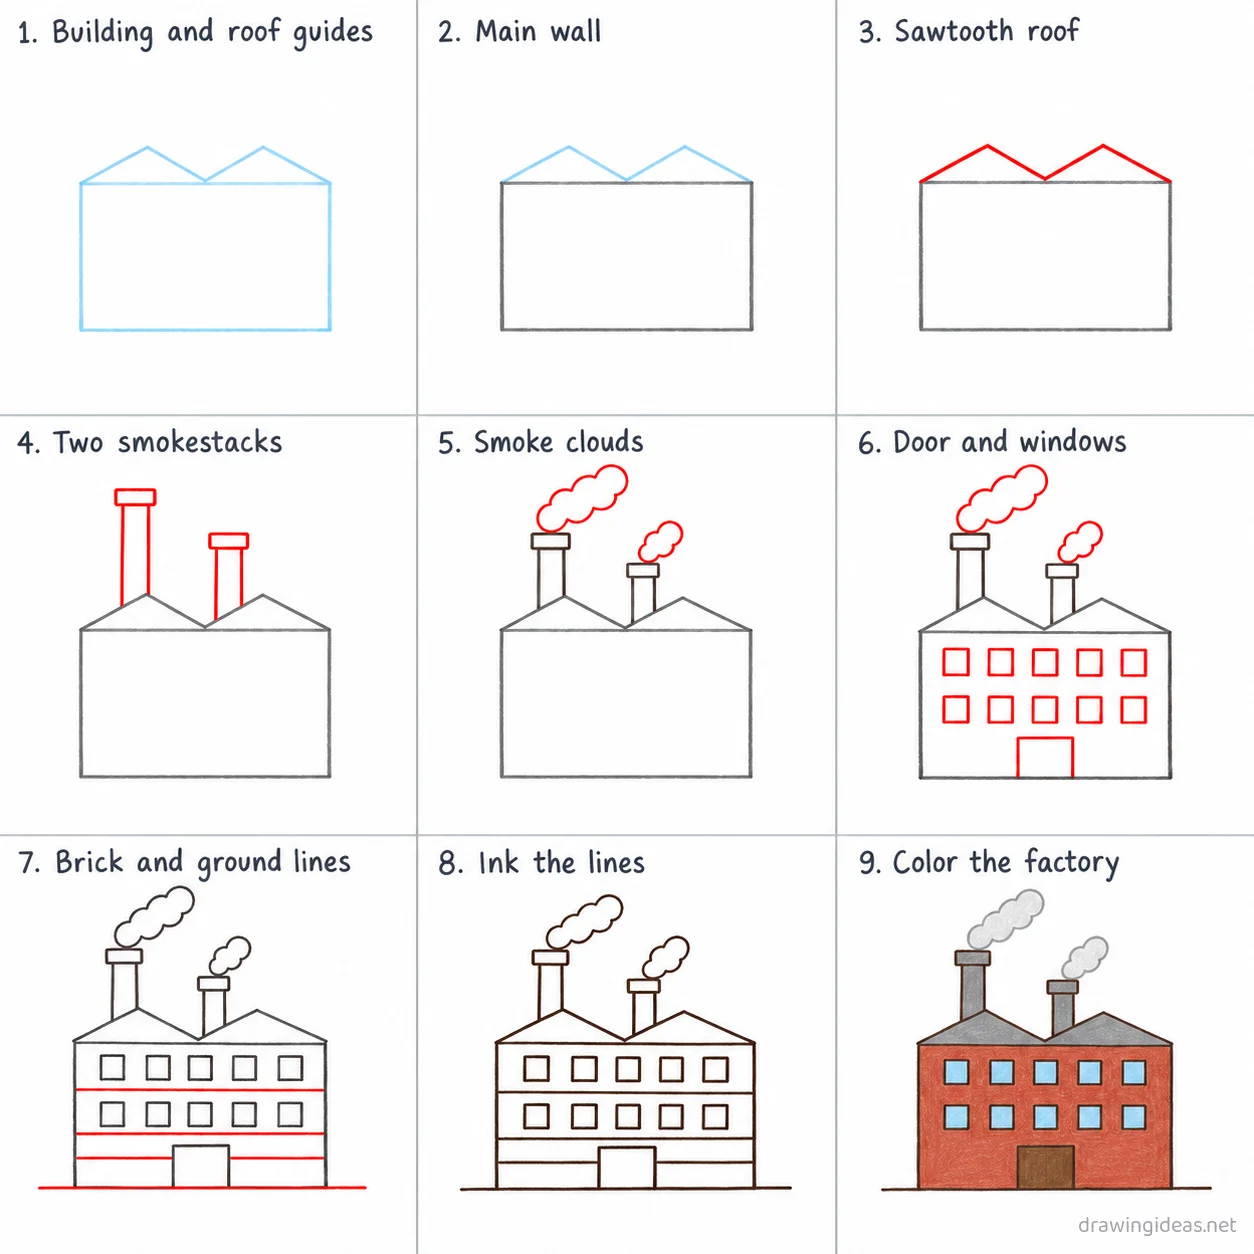
Draw a light rectangle in the middle of the page for the main building, then a thin zigzag guide along its top for the roofline.
-
Building and roof guides
Draw a light rectangle in the middle of the page for the main building, then a thin zigzag guide along its top for the roofline.
-
Main wall
Trace the outline of the main building wall on the rectangle guide, flat along the bottom.
-
Sawtooth roof
Trace a zigzag sawtooth roofline on top of the main wall, following the roof guide.
-
Two smokestacks
Add a tall thin smokestack rising from the roof on the left, and a slightly shorter one further right, each with a wider cap.
-
Smoke clouds
Add puffy round smoke clouds drifting up and to the right from the top of each smokestack.
-
Door and windows
Add a wide rectangular door centered at the base of the wall, then two rows of five square windows above it.
-
Brick and ground lines
Add three long horizontal lines across the wall for brick courses, then one straight ground line under the whole building.
-
Ink the lines
Go over every kept line with dark ink, then erase the light rectangle and roofline guides.
-
Color the factory
Fill the wall brick red, the roof and smokestacks gray, the door brown, the windows light blue, and the smoke pale gray.
Factory Drawing Ideas to Try Next
Once the basic factory clicks, run it through these variations — each one practices a different skill while staying on a subject you already know.
-
Factory at night with lit windows
Dark silhouette, warm yellow windows — two tones that do all the storytelling.
-
A crooked storybook factory
Let every line lean and bulge on purpose — fairy-tale architecture is anatomy-proof.
-
A factory floating on an island
Draw it on a chunk of floating earth with roots dangling below — the classic fantasy vignette.
-
Factory reflected in water
The structure above a wavy mirrored copy below — draw the reflection with broken horizontal lines.
-
Isometric mini factory
Draw it at the video-game 30° angle, clean lines, flat colors — the most satisfying architectural style to learn.
Tips for Better Factory Drawings
- Windows and doors align in rows and columns — builders use levels. Misaligned openings are the #1 tell of a rushed building drawing.
- Add one scale reference (a figure, a door, a tree) — buildings only feel big next to something small.
Not feeling the factory today?
Let the generator pick your next subject — filtered by mood and difficulty.
🎲 Random Drawing GeneratorFactory Drawing FAQ
What is the easiest way to draw a factory?
Start with stacked rectangles with a roof shape, keeping your lines light. Refine the outline, add the defining details, then erase the construction shapes. The nine-step method above breaks this down — most people get a recognizable factory on their very first try with it.
How long does a factory drawing take?
A simple factory drawing takes about 18 minutes following this tutorial. A quick doodle version can be done in two or three minutes, while a detailed, fully-shaded study might take an hour. Speed comes with repetition — the second attempt is always faster than the first.
What do I need to draw a factory?
Just a pencil, an eraser, and any paper. An HB pencil for construction lines and a 2B for final outlines is a nice upgrade, and colored pencils or markers finish it off — but nothing on this page requires special supplies.
Is a factory easy to draw for beginners?
Yes — the factory is very manageable once you use construction shapes, and this method was written for first-timers. Kids can follow the same steps; just expect wobblier lines and more charm.