Mercury Drawing: Step-by-Step Tutorial & Easy Ideas
Every good mercury drawing starts the same way: circles and ellipses, refined step by step into a finished piece. Below you'll find a complete step-by-step tutorial you can follow with any pencil and paper, plus easy mercury drawing ideas — from quick five-minute doodles to more detailed studies.
- Difficulty Easy
- Time ~12 min
- Tools Pencil, eraser, paper
- Starts with circles and ellipses
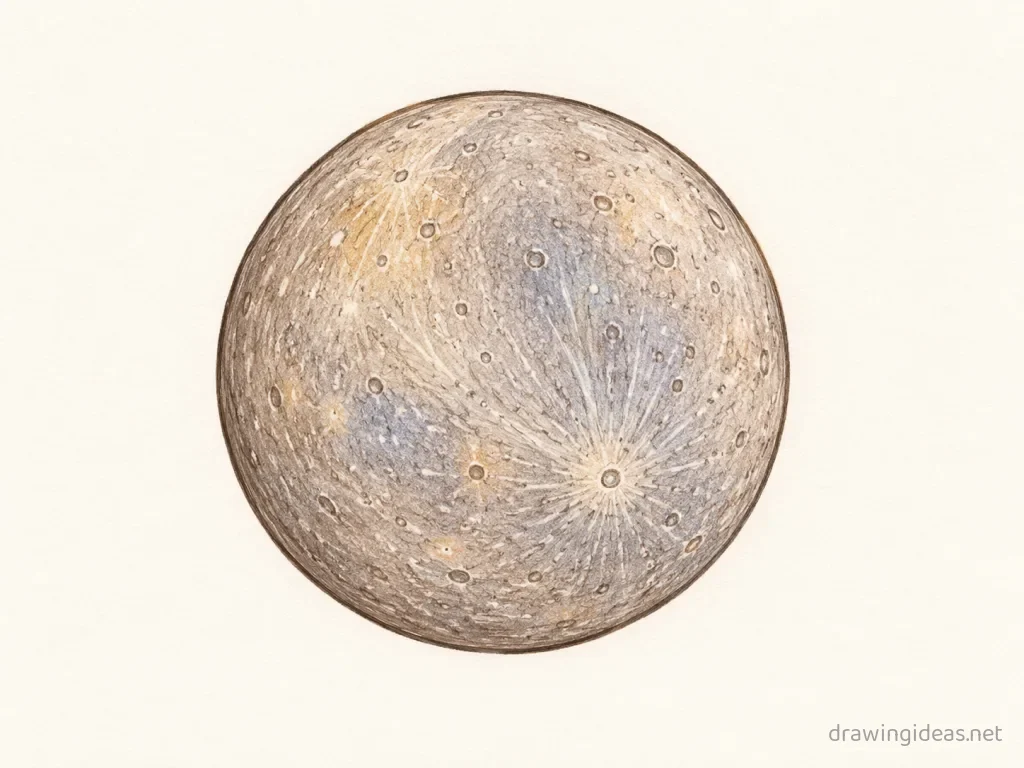
How to Draw a Mercury Step by Step
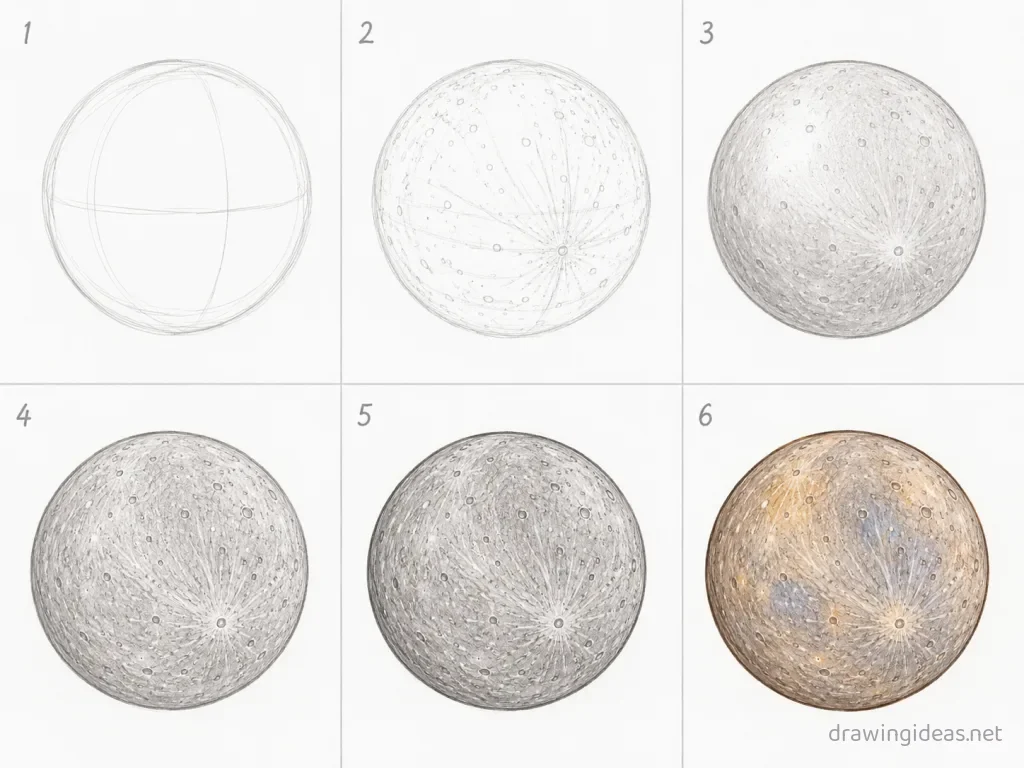
-
Block the primary form
Most space subjects reduce to circles and ellipses — draw the mercury's main geometry precisely, using a traced circle where possible.
-
Add the structural features
Draw the features that define this mercury — rings, panels, fins, craters, or swirls — following the curvature of the main form.
-
Establish the light side
Space lighting is stark: pick where the sun is and commit. One side bright, the other falling to deep shadow with a crisp terminator line.
-
Detail the surface
Add surface character in the lit zone — texture, markings, small features — and let detail vanish into the shadow side.
-
Build the background
Scatter stars (clusters and gaps, never even spacing), maybe a distant planet or nebula wisp. Black space makes every subject pop.
-
Add the glow
Halos, engine trails, atmosphere rims — a soft glow effect against the dark background is what makes space drawings feel luminous.
Mercury Drawing Ideas to Try Next
Once the basic mercury clicks, run it through these variations — each one practices a different skill while staying on a subject you already know.
-
Retro poster mercury
Flat colors, bold shapes, vintage NASA-poster energy.
-
Mercury line-art constellation style
Reduce it to dots connected by thin lines, with a few star sparkles.
-
A cat or astronaut floating near the mercury
One floating figure adds scale and whimsy to any cosmic scene.
-
A mercury in a jar
The miniature-cosmos trend: your mercury glowing inside a corked jar.
Tips for Better Mercury Drawings
- Space lighting is binary: one crisp bright side, one deep dark side. Timid, even shading kills the cosmic look.
- Scatter stars in clusters with gaps — evenly spaced stars read as wallpaper, clustered stars read as sky.
Not feeling the mercury today?
Let the generator pick your next subject — filtered by mood and difficulty.
🎲 Random Drawing GeneratorMercury Drawing FAQ
What is the easiest way to draw a mercury?
Start with circles and ellipses, keeping your lines light. Refine the outline, add the defining details, then erase the construction shapes. The six-step method above breaks this down — most people get a recognizable mercury on their very first try with it.
How long does a mercury drawing take?
A simple mercury drawing takes about 12 minutes following this tutorial. A quick doodle version can be done in two or three minutes, while a detailed, fully-shaded study might take an hour. Speed comes with repetition — the second attempt is always faster than the first.
What do I need to draw a mercury?
Just a pencil, an eraser, and any paper. An HB pencil for construction lines and a 2B for final outlines is a nice upgrade, and colored pencils or markers finish it off — but nothing on this page requires special supplies.
Can kids draw a mercury?
Yes — the mercury is one of the friendlier subjects for beginners, and this method was written for first-timers. Kids can follow the same steps; just expect wobblier lines and more charm.