Liver Drawing: Step-by-Step Tutorial & Easy Ideas
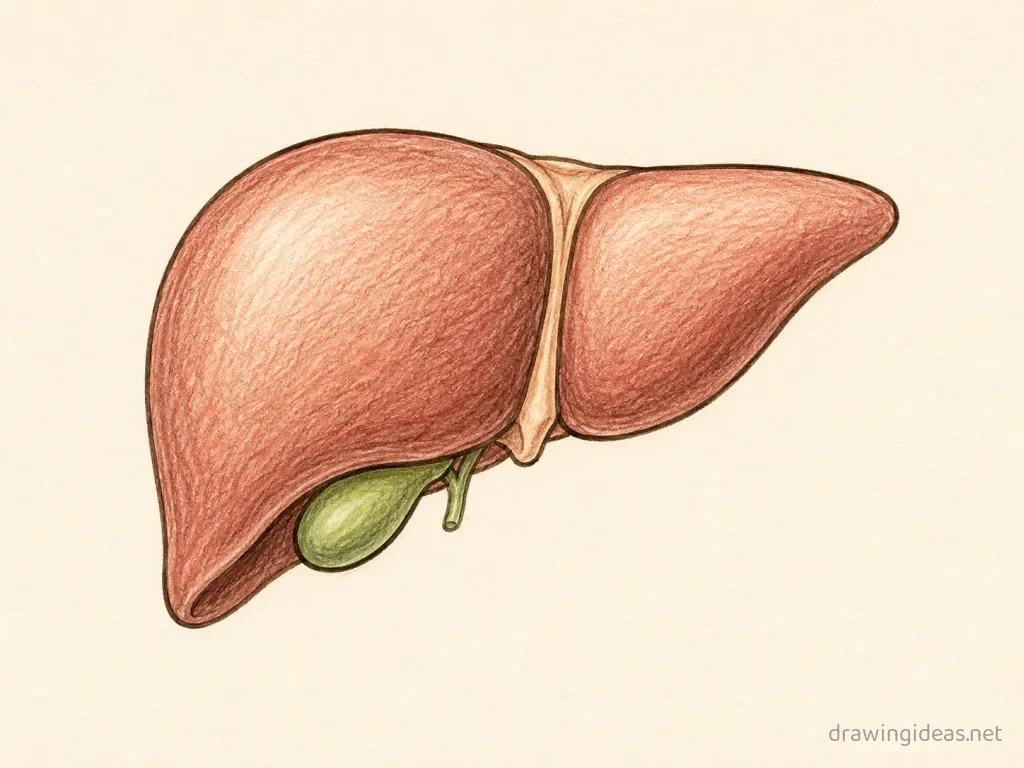
Learning how to draw a liver is easier than it looks — the whole thing starts with one clear outline divided into labeled regions. This guide walks you through a liver drawing in six clear steps, then hands you a set of liver drawing ideas to keep going: easy versions for beginners, cute and cartoon takes, and variations worth sketching when you want more.
- Difficulty Medium
- Time ~15 min
- Tools Pencil, eraser, paper
- Starts with one clear outline divided into labeled regions
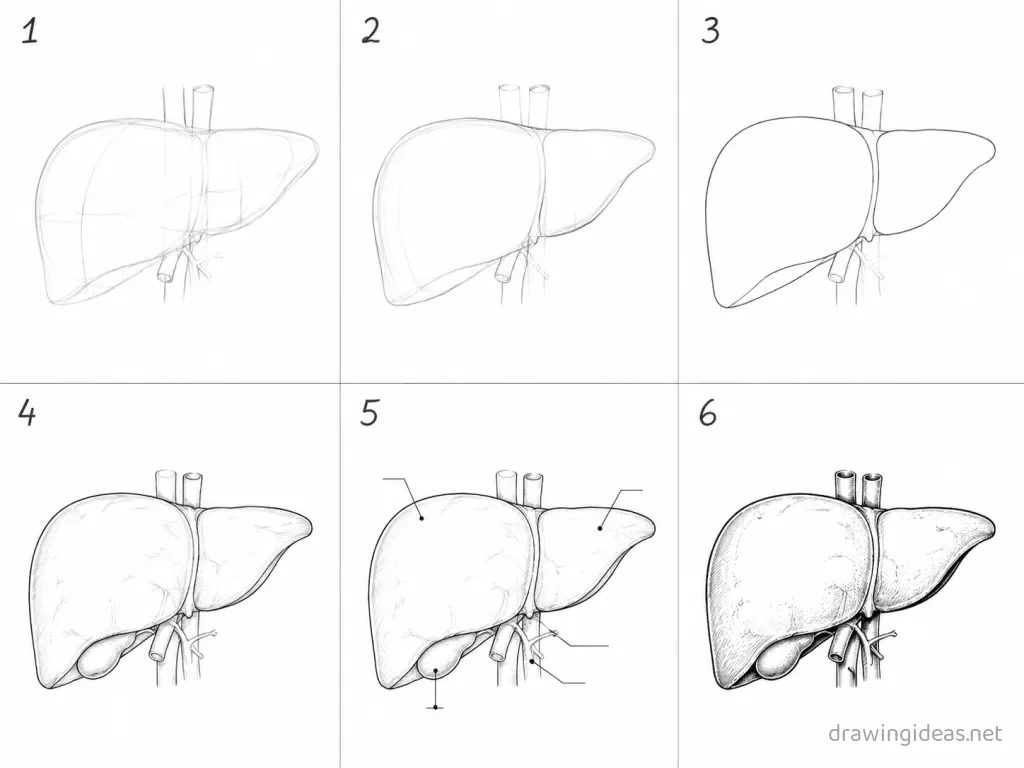
How to Draw a Liver Step by Step
-
Research the accurate structure
For a liver drawing, accuracy counts — check a textbook or reliable diagram first so your drawing teaches the right thing.
-
Block the overall shape
Draw the whole structure as one simple outline first, sized to leave margin room for labels if you need them.
-
Divide into the major parts
Split the shape into its key regions or components with light boundary lines, keeping relative sizes truthful.
-
Detail each part
Work part by part, giving each its characteristic texture or pattern so regions stay visually distinct.
-
Add labels if needed
For diagrams: straight pointer lines (never crossing) from each part to a clearly printed label. For art: skip labels, deepen detail instead.
-
Finalize with clean contrast
Strong outlines, distinct shading or color per region, and a title if it's homework. Clean beats fancy for school drawings every time.
Liver Drawing Ideas to Try Next
Once the basic liver clicks, run it through these variations — each one practices a different skill while staying on a subject you already know.
-
A poster-style liver with title lettering
Big title, the liver center-stage, two or three fact callouts — the class-project format.
-
A labeled diagram of the liver
The classic homework version: clean outline, distinct regions, straight pointer lines to printed labels.
-
Liver as a friendly cartoon
Give it eyes and a smile — the memorable-mnemonic style that makes studying stick.
-
A step-by-step process strip
Show the liver in stages across three or four panels, with arrows — perfect for processes and cycles.
Tips for Better Liver Drawings
- Accuracy first: check a textbook diagram before you stylize. A beautiful but wrong diagram loses marks and teaches nothing.
- Label lines should never cross each other — plan label positions around the drawing before writing any text.
Not feeling the liver today?
Let the generator pick your next subject — filtered by mood and difficulty.
🎲 Random Drawing GeneratorLiver Drawing FAQ
What is the easiest way to draw a liver?
Start with one clear outline divided into labeled regions, keeping your lines light. Refine the outline, add the defining details, then erase the construction shapes. The six-step method above breaks this down — most people get a recognizable liver on their very first try with it.
How long should it take to draw a liver?
A simple liver drawing takes about 15 minutes following this tutorial. A quick doodle version can be done in two or three minutes, while a detailed, fully-shaded study might take an hour. Speed comes with repetition — the second attempt is always faster than the first.
What supplies do I need for liver drawings?
Just a pencil, an eraser, and any paper. An HB pencil for construction lines and a 2B for final outlines is a nice upgrade, and colored pencils or markers finish it off — but nothing on this page requires special supplies.
Can kids draw a liver?
Yes — the liver is very manageable once you use construction shapes, and this method was written for first-timers. Kids can follow the same steps; just expect wobblier lines and more charm.