Huggy Wuggy Drawing: Step-by-Step Tutorial & Easy Ideas
Huggy Wuggy drawings are one of the most-loved sketching subjects, and for good reason — the basic version comes together from the character’s two or three signature shapes in just a few minutes. Follow the nine steps below to get the foundations right, then browse the ideas list for your next Huggy Wuggy sketch.
- Difficulty Medium
- Time ~20 min
- Tools Pencil, eraser, paper
- Starts with the character’s two or three signature shapes
How to Draw Huggy Wuggy Step by Step
Step 1 of 9
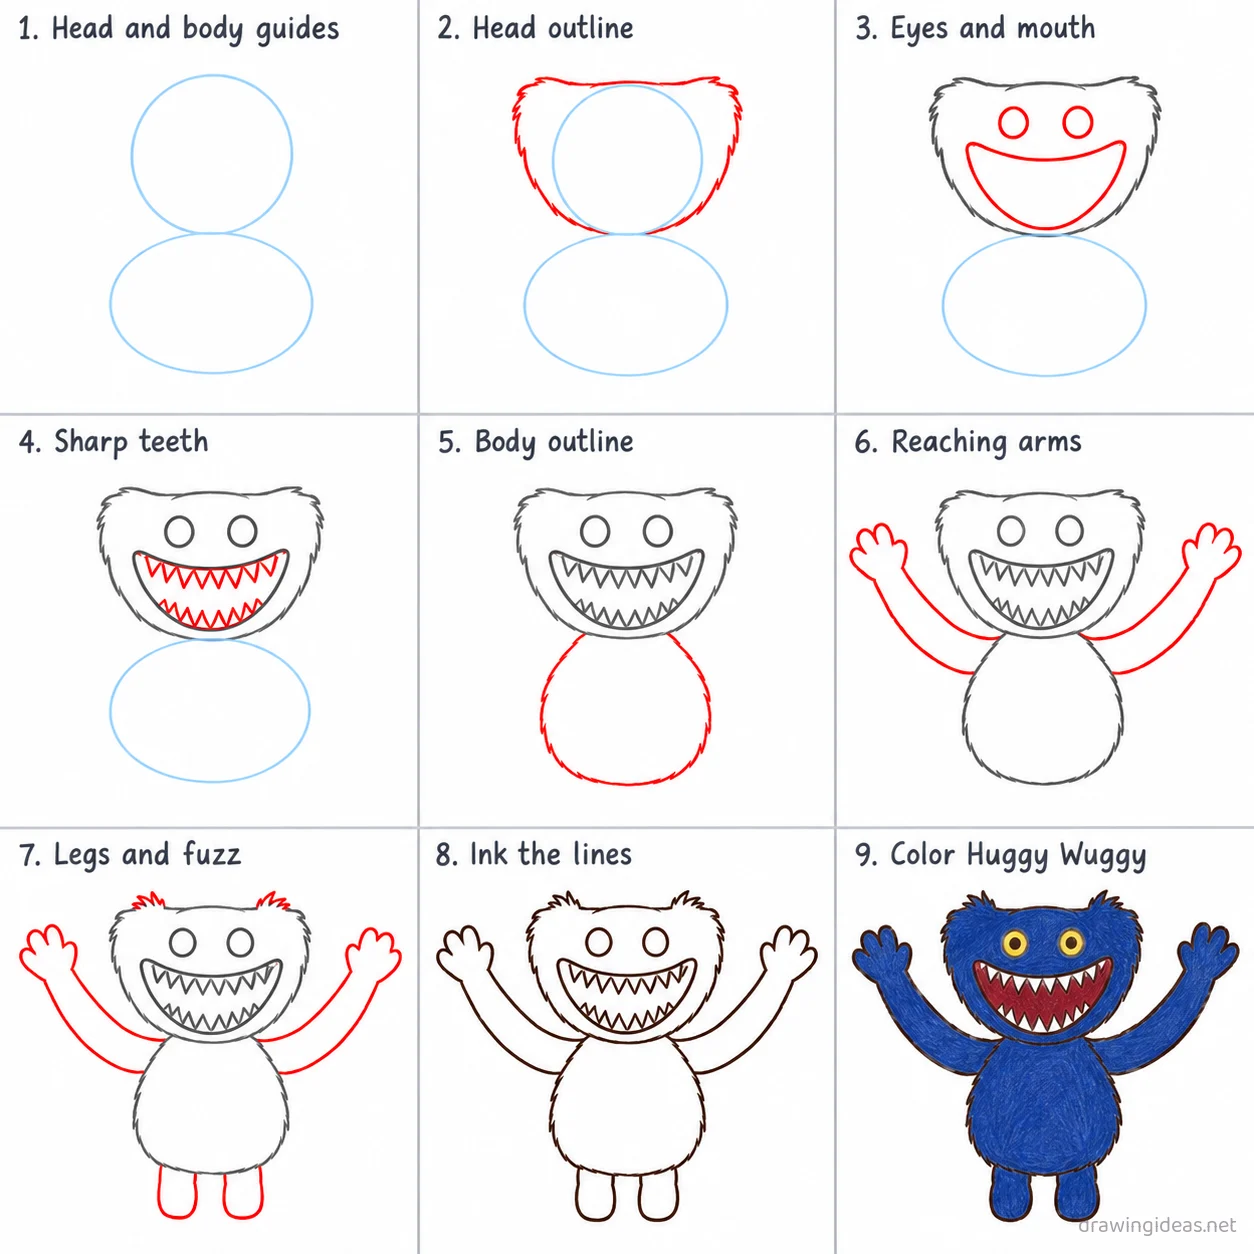
Head and body guides
Draw a large light circle for the head in the upper middle of the page, then a smaller oval below it for the body.
-
Head and body guides
Draw a large light circle for the head in the upper middle of the page, then a smaller oval below it for the body.
-
Head outline
Trace the rounded blob outline of the head over the guide circle, slightly wider near the cheeks.
-
Eyes and mouth
Add two small round eyes on the upper head, then a huge wide open mouth curve across the lower head.
-
Sharp teeth
Add a row of sharp triangular teeth along the top of the mouth, then a matching row along the bottom.
-
Body outline
Trace the rounded body outline on the oval guide, connecting smoothly below the head.
-
Reaching arms
Draw a long thick arm reaching up and out from the left side of the body, then a matching arm on the right side.
-
Legs and fuzz
Add two short stubby legs at the bottom of the body, then two small fuzzy tufts along the top of the head.
-
Ink the lines
Go over every kept line with dark ink, then erase the light head and body guide shapes.
-
Color Huggy Wuggy
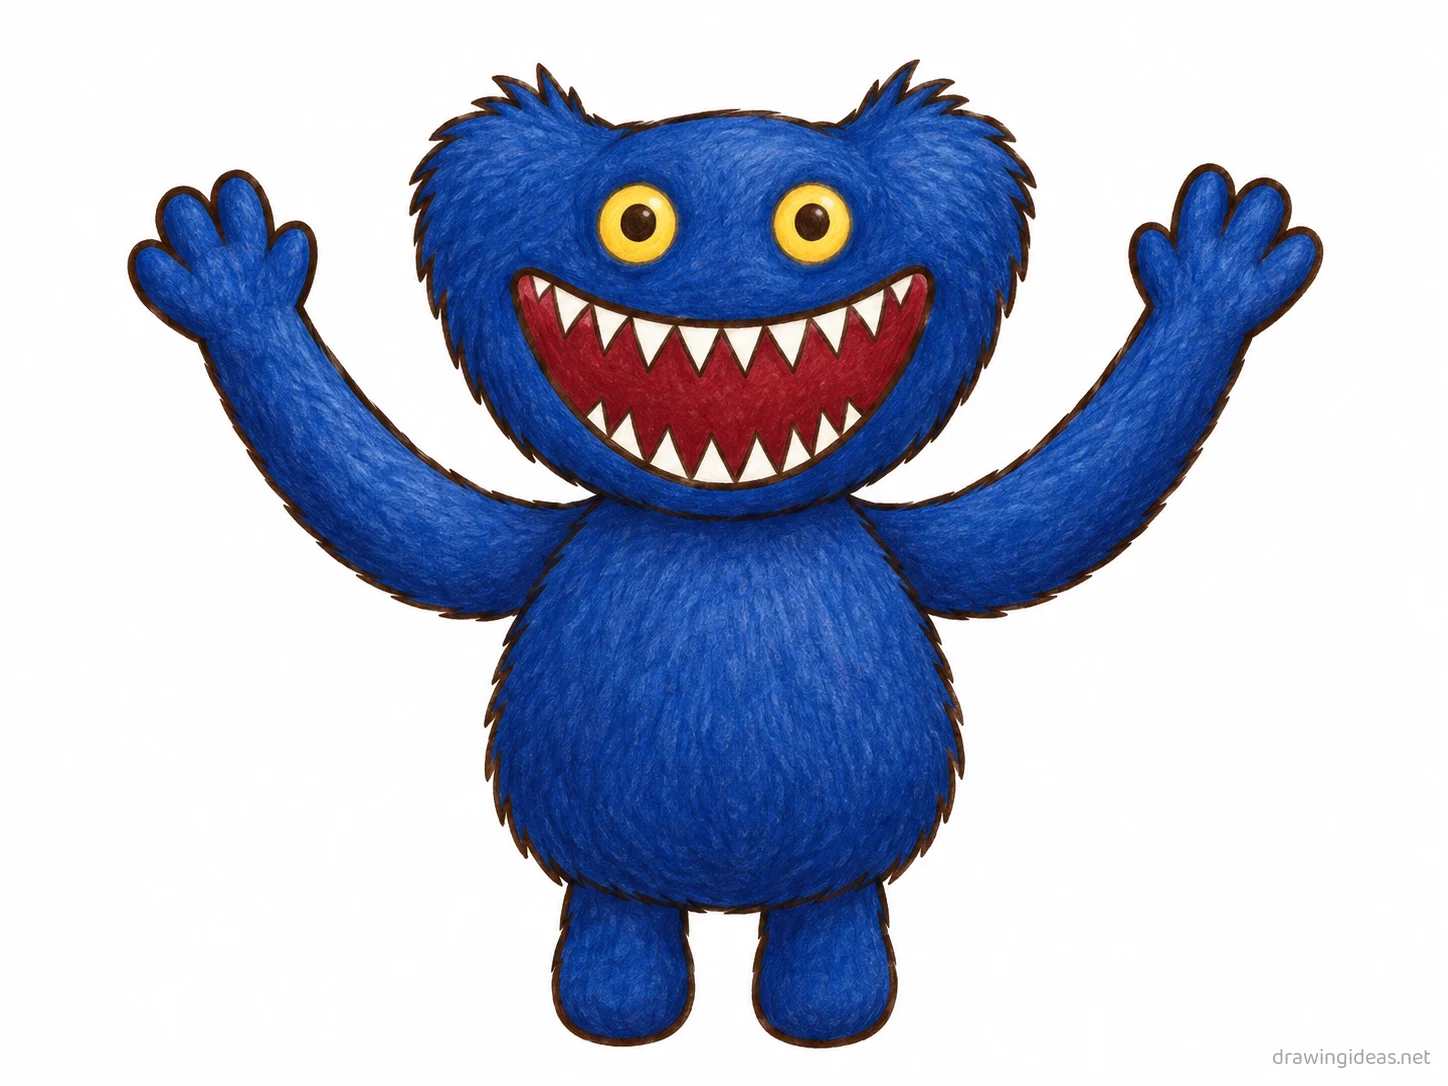
Fill the fur deep blue, the mouth interior dark red, the teeth white, and the eyes bright yellow.
Huggy Wuggy Drawing Ideas to Try Next
Once the basic Huggy Wuggy clicks, run it through these variations — each one practices a different skill while staying on a subject you already know.
-
Huggy Wuggy as a simple icon
Reduce the character to 3–4 shapes that still read instantly — a real design challenge.
-
Chibi Huggy Wuggy
Two-heads-tall version: giant head, tiny body, maximum cute — the most forgiving fan-art style.
-
An expression sheet
The same face six times: happy, angry, shocked, smug, sleepy, crying — how professionals actually practice a character.
-
Huggy Wuggy in a different art style
Redraw the character as if another show's artist drew them — a style-study exercise fans love to see.
-
Huggy Wuggy doing something mundane
Grocery shopping, waiting for the bus, doing taxes — the comedy of icons in ordinary life.
Tips for Better Huggy Wuggy Drawings
- Likeness lives in the silhouette: if you fill your character drawing with solid black and it’s still recognizable, you’ve nailed it. If not, no amount of interior detail will save it.
- Count heads: character proportions are deliberate design choices, and using the wrong head-count is why fan art looks "off" even when every feature is right.
Not feeling Huggy Wuggy today?
Let the generator pick your next subject — filtered by mood and difficulty.
🎲 Random Drawing GeneratorHuggy Wuggy Drawing FAQ
What is the easiest way to draw Huggy Wuggy?
Start with the character’s two or three signature shapes, keeping your lines light. Refine the outline, add the defining details, then erase the construction shapes. The nine-step method above breaks this down — most people get a recognizable Huggy Wuggy on their very first try with it.
How long should it take to draw Huggy Wuggy?
A simple Huggy Wuggy drawing takes about 20 minutes following this tutorial. A quick doodle version can be done in two or three minutes, while a detailed, fully-shaded study might take an hour. Speed comes with repetition — the second attempt is always faster than the first.
What supplies do I need for Huggy Wuggy drawings?
Just a pencil, an eraser, and any paper. An HB pencil for construction lines and a 2B for final outlines is a nice upgrade, and colored pencils or markers finish it off — but nothing on this page requires special supplies.
Can kids draw Huggy Wuggy?
Yes — Huggy Wuggy is very manageable once you use construction shapes, and this method was written for first-timers. Kids can follow the same steps; just expect wobblier lines and more charm.