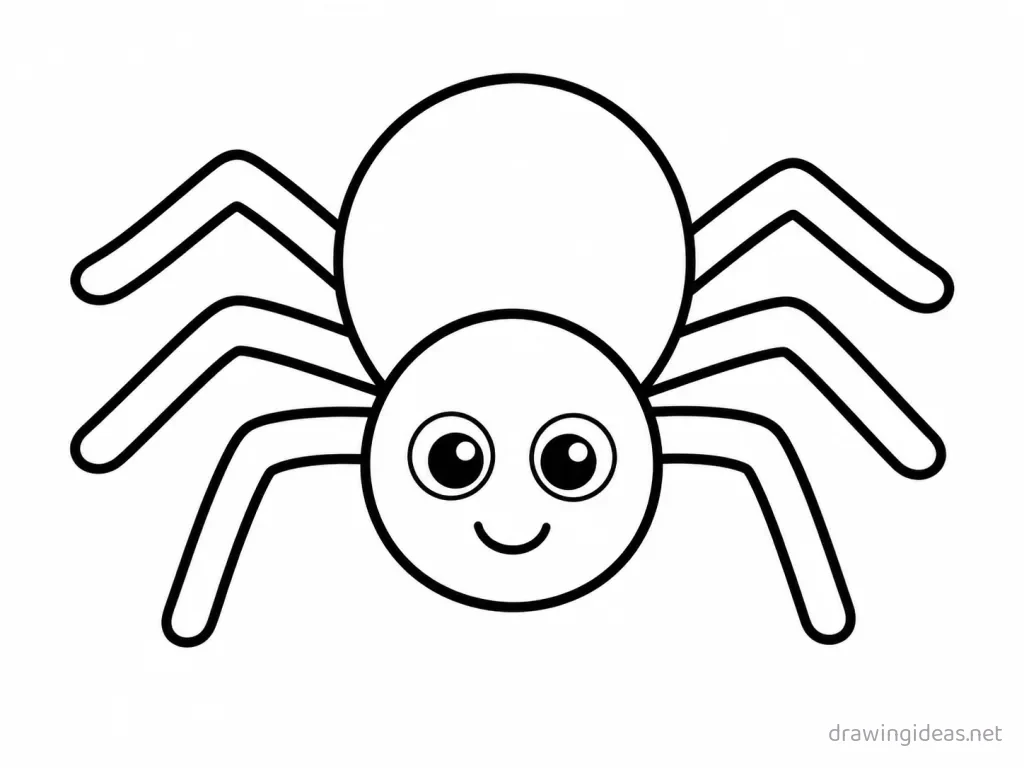
Easy Spider Drawing: Simple Step-by-Step for Beginners
This is the simplest way to draw a spider — built from a circle for the head and an oval for the body, with every step small enough for total beginners and kids. No shading skills, no special supplies: a pencil, an eraser and five spare minutes get you a finished, recognizable spider drawing.
- Difficulty Easy
- Time ~9 min
- Tools Pencil, eraser, paper
- Starts with a circle for the head and an oval for the body
How to Draw an Easy Spider, Step by Step

-
Block in the basic shapes
Start a spider with two simple shapes: a circle or oval for the head and a larger oval for the body. Keep the lines loose — wobbles are fine at this stage.
-
Connect the head and body
Join the two shapes with smooth neck and back lines. Simpler is better here: one confident line beats three careful ones.
-
Add the legs and posture
Sketch the legs as simple lines with small circles at each joint, then thicken them into shapes. If it looks off, adjust the big shape rather than adding detail.
-
Shape the head features
Place the eyes about halfway down the head, then add the ears, nose, and mouth. A rough version of this step is good enough — keep moving.
-
Refine the outline
Erase your construction shapes and draw one confident final outline, following the muscle and fur curves rather than the geometric guides. Draw this bigger than feels natural; big shapes are easier to control.
-
Add texture and shading
Break the outline with short fur or skin-texture strokes, shade the underside and any overlaps, and darken the eyes with a white highlight left in each. Done is better than perfect — finish the step and move on.
Want the full detailed version?
The complete Spider drawing tutorial covers proportions, texture and shading in depth.
Full Spider Drawing Tutorial →Easy Spider Drawing Ideas
Continuous one-line spider
Draw the whole spider without lifting your pen. Great warm-up, and the wobbles are the style.
A sleeping spider curled up
Sleeping poses tuck away the legs and face details — draw one restful curve and let the pose forgive the anatomy.
A spider peeking around a corner
Half the animal hides behind an edge — you draw the easy half and the composition feels playful.
A baby spider next to its parent
Same drawing twice at two sizes with bigger eyes on the little one — instant "aww" with skills you already have.
A geometric low-poly spider
Build the spider from straight-edged triangles only — a modern design look that secretly teaches structure.
A cartoon spider with a tiny accessory
Round everything, shrink the body, add one hat/bow/scarf. Accessories add personality for nearly zero extra difficulty.
Easy Drawing Tips
- Trace your own drawing once. Tracing something you already drew builds muscle memory twice as fast as starting over.
- Finish it even if it looks wrong at step 3. Every finished easy drawing teaches the whole sequence; abandoned perfect starts teach nothing.
- Draw big. Beginners instinctively draw tiny, and tiny drawings are actually harder — small curves demand more finger control than big arm strokes. Fill at least half the page.
FAQ
What is the easiest way to draw a spider?
Start with a circle for the head and an oval for the body and keep every line light until the shape looks right — that's the entire method above. Most beginners get a recognizable spider drawing on the first try because each step is one simple move.
Can kids follow this spider drawing tutorial?
Yes — this version was written for young artists: big forgiving shapes, no shading, no fine details. Ages 5-6 and up can usually follow along with a little help reading the steps.
How long does the easy version take?
About five minutes for the basic drawing — roughly half the time of the full tutorial. Adding color takes another few minutes.