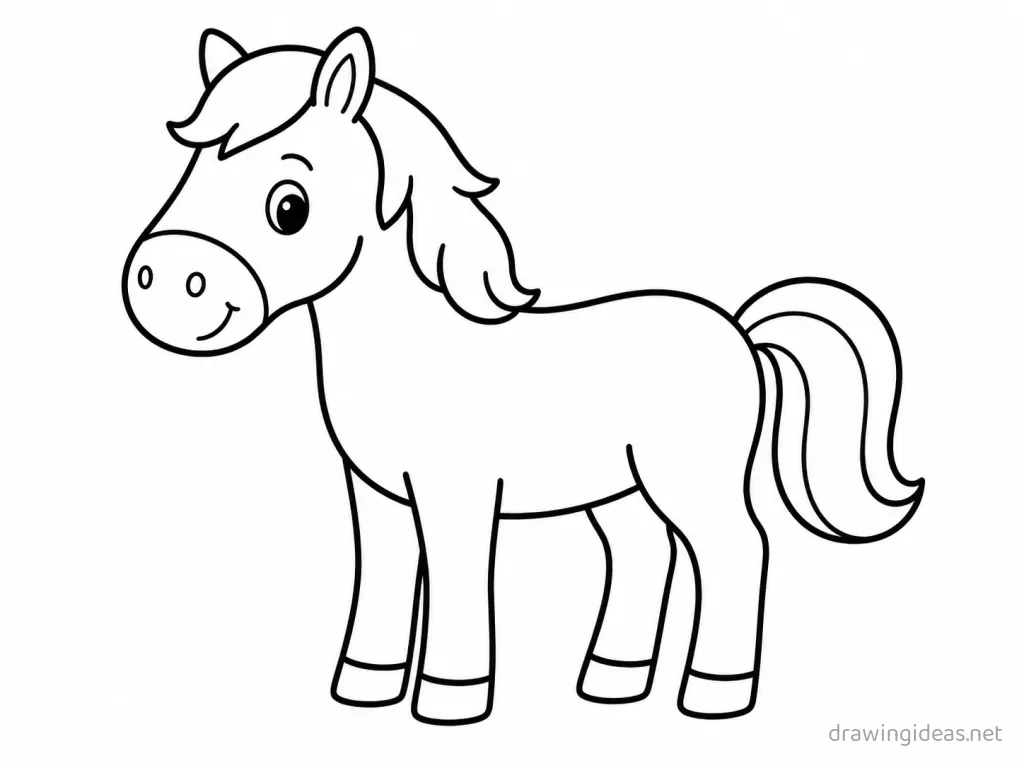
Easy Horse Drawing: Simple Step-by-Step for Beginners
This is the simplest way to draw a horse — built from two circles for chest and hindquarters connected by a back line, with every step small enough for total beginners and kids. No shading skills, no special supplies: a pencil, an eraser and five spare minutes get you a finished, recognizable horse drawing.
- Difficulty Easy
- Time ~18 min
- Tools Pencil, eraser, paper
- Starts with two circles for chest and hindquarters connected by a back line
How to Draw an Easy Horse, Step by Step
-
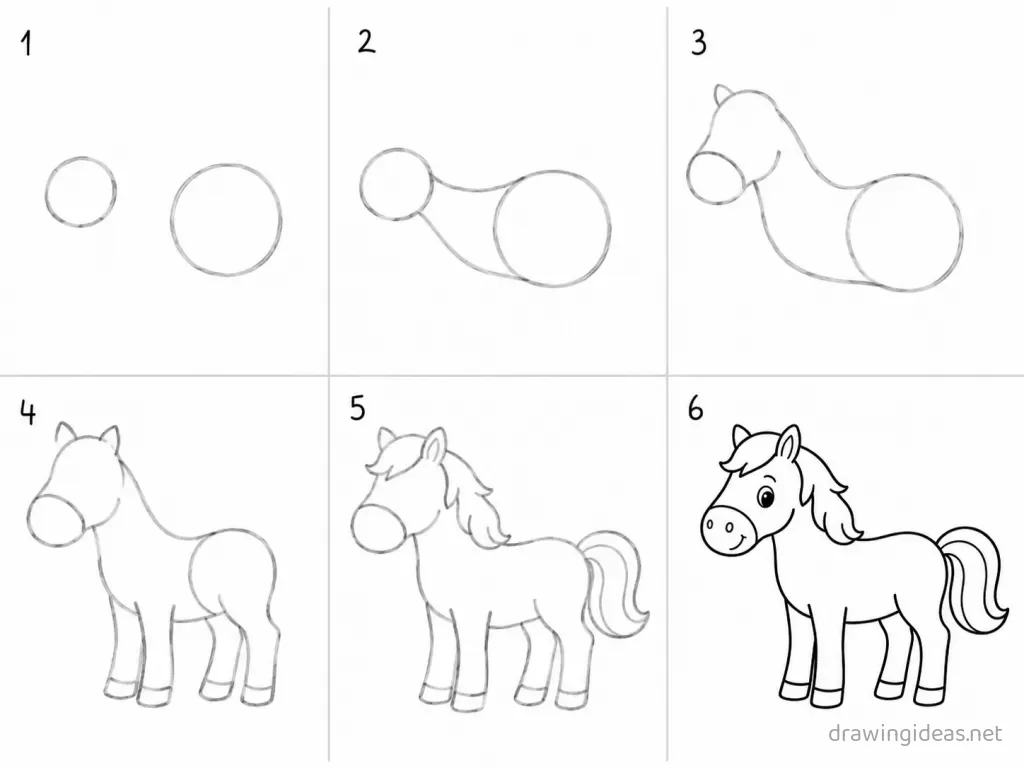
Draw the two body circles
A circle for the chest and another, same size, a bit behind it for the hindquarters. Keep the lines loose — wobbles are fine at this stage.
-
Connect the body
Join the circles with a slightly dipped back line on top and a straighter belly line below. Simpler is better here: one confident line beats three careful ones.
-
Build the neck and head
From the chest circle's top, draw a thick neck angling up to a small circle for the head, then attach a squared muzzle shape to it — like a shoebox on a ball. If it looks off, adjust the big shape rather than adding detail.
-
Place the legs
Front legs drop from the chest circle, back legs from the hindquarters with a Z-bend at the hock. A rough version of this step is good enough — keep moving.
-
Add mane and tail
The mane flows off the neck's top edge in a few long ribbons; the tail streams from the hindquarters in one thick, wavy mass. Draw this bigger than feels natural; big shapes are easier to control.
-
Refine the outline
Erase the construction circles, carve in the muscle curves — chest bulge, belly tuck-up, haunch curve — and add the eye, nostril, and pointed ears. Done is better than perfect — finish the step and move on.
Want the full detailed version?
The complete Horse drawing tutorial covers proportions, texture and shading in depth.
Full Horse Drawing Tutorial →Easy Horse Drawing Ideas
A cartoon horse with a tiny accessory
Round everything, shrink the body, add one hat/bow/scarf. Accessories add personality for nearly zero extra difficulty.
Horse face close-up portrait
Crop to just the face and make the eyes the star. Big expressive eyes carry the whole piece.
A sleeping horse curled up
Sleeping poses tuck away the legs and face details — draw one restful curve and let the pose forgive the anatomy.
A geometric low-poly horse
Build the horse from straight-edged triangles only — a modern design look that secretly teaches structure.
A baby horse next to its parent
Same drawing twice at two sizes with bigger eyes on the little one — instant "aww" with skills you already have.
A horse in its natural habitat
Add two or three environment elements behind your horse — the scene sells the story without needing a full background.
Easy Drawing Tips
- Finish it even if it looks wrong at step 3. Every finished easy drawing teaches the whole sequence; abandoned perfect starts teach nothing.
- Draw big. Beginners instinctively draw tiny, and tiny drawings are actually harder — small curves demand more finger control than big arm strokes. Fill at least half the page.
- Use a light pencil for the shape stage and press harder only on the final outline — being able to erase guide lines is what makes the simple method forgiving.
FAQ
What is the easiest way to draw a horse?
Start with two circles for chest and hindquarters connected by a back line and keep every line light until the shape looks right — that's the entire method above. Most beginners get a recognizable horse drawing on the first try because each step is one simple move.
Can kids follow this horse drawing tutorial?
Yes — this version was written for young artists: big forgiving shapes, no shading, no fine details. Ages 5-6 and up can usually follow along with a little help reading the steps.
How long does the easy version take?
About five minutes for the basic drawing — roughly half the time of the full tutorial. Adding color takes another few minutes.