Cinnamoroll Drawing: Step-by-Step Tutorial & Easy Ideas
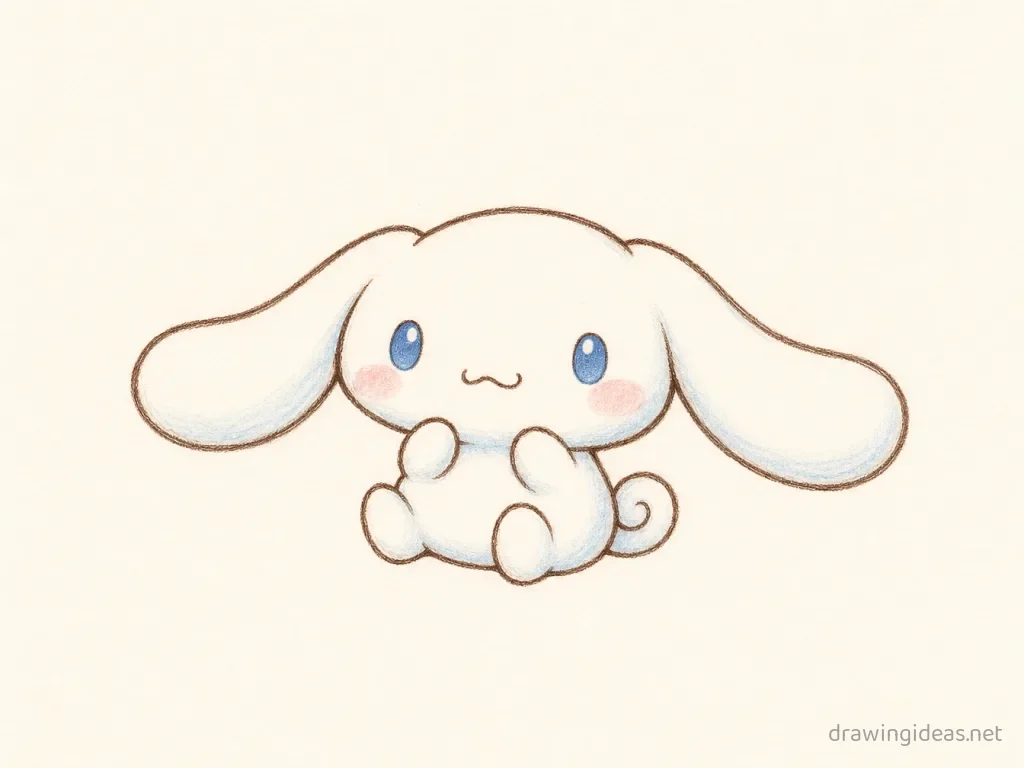
Learning how to draw Cinnamoroll is easier than it looks — the whole thing starts with the character’s two or three signature shapes. This guide walks you through a Cinnamoroll drawing in six clear steps, then hands you a set of Cinnamoroll drawing ideas to keep going: easy versions for beginners, cute and cartoon takes, and variations worth sketching when you want more.
- Difficulty Medium
- Time ~20 min
- Tools Pencil, eraser, paper
- Starts with the character’s two or three signature shapes
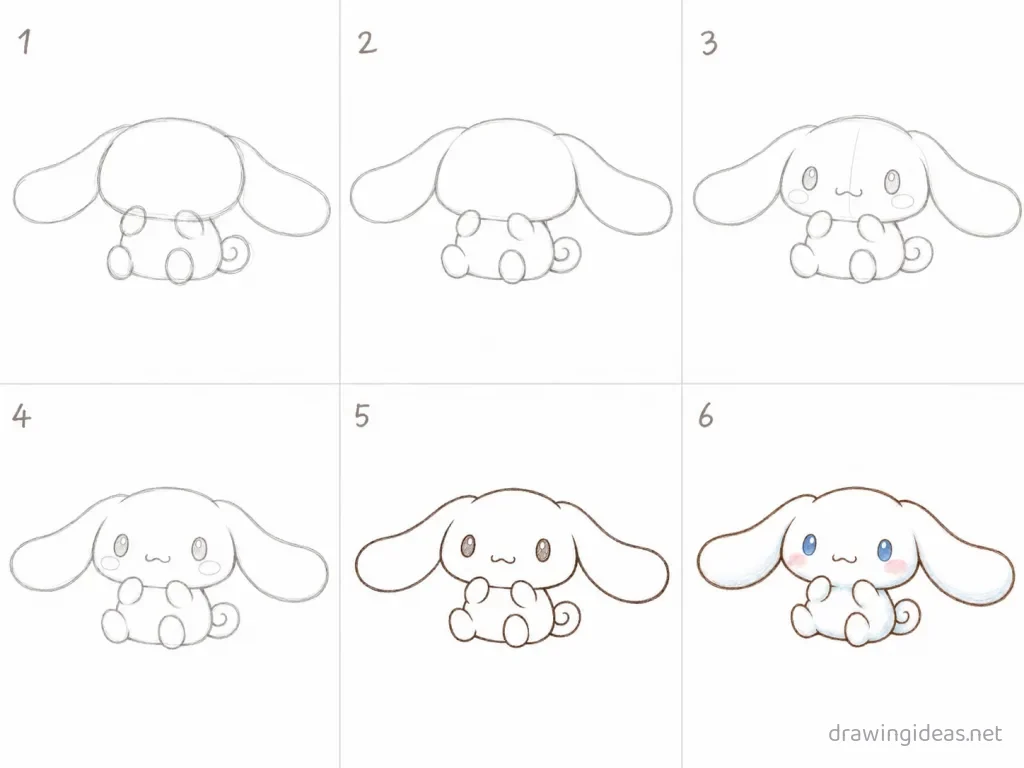
How to Draw Cinnamoroll Step by Step
-
Study the signature shapes
Every famous character is built from a signature shape language. Look at Cinnamoroll and find the 2–3 shapes that define the silhouette — that's the likeness, not the small details.
-
Block the head and body ratio
Measure how many heads tall the character is and block head and body at that ratio. Getting a character's proportions wrong is the #1 reason fan art looks off.
-
Place the facial features
Position the eyes, nose, and mouth using the character's own rules — cartoon faces have specific, deliberate feature placements. Light guidelines first.
-
Add the identifying details
Draw the features nobody would recognize the character without — the hair shape, outfit elements, accessories. Prioritize these over generic details.
-
Ink the clean line
Erase construction lines and draw the final outline with confident strokes, varying line weight — thicker outside, thinner inside — like the original artists do.
-
Color with the official palette
Use the character's canonical colors; approximations break the likeness surprisingly fast. Flat colors with simple cel shading match most source styles.
Cinnamoroll Drawing Ideas to Try Next
Once the basic Cinnamoroll clicks, run it through these variations — each one practices a different skill while staying on a subject you already know.
-
Chibi Cinnamoroll
Two-heads-tall version: giant head, tiny body, maximum cute — the most forgiving fan-art style.
-
Cinnamoroll doing something mundane
Grocery shopping, waiting for the bus, doing taxes — the comedy of icons in ordinary life.
-
Cinnamoroll in a different art style
Redraw the character as if another show's artist drew them — a style-study exercise fans love to see.
-
An expression sheet
The same face six times: happy, angry, shocked, smug, sleepy, crying — how professionals actually practice a character.
-
Cinnamoroll as a simple icon
Reduce the character to 3–4 shapes that still read instantly — a real design challenge.
Tips for Better Cinnamoroll Drawings
- Likeness lives in the silhouette: if you fill your character drawing with solid black and it’s still recognizable, you’ve nailed it. If not, no amount of interior detail will save it.
- Count heads: character proportions are deliberate design choices, and using the wrong head-count is why fan art looks "off" even when every feature is right.
Not feeling Cinnamoroll today?
Let the generator pick your next subject — filtered by mood and difficulty.
🎲 Random Drawing GeneratorCinnamoroll Drawing FAQ
How do you draw Cinnamoroll easily?
Start with the character’s two or three signature shapes, keeping your lines light. Refine the outline, add the defining details, then erase the construction shapes. The six-step method above breaks this down — most people get a recognizable Cinnamoroll on their very first try with it.
How long does Cinnamoroll drawing take?
A simple Cinnamoroll drawing takes about 20 minutes following this tutorial. A quick doodle version can be done in two or three minutes, while a detailed, fully-shaded study might take an hour. Speed comes with repetition — the second attempt is always faster than the first.
What supplies do I need for Cinnamoroll drawings?
Just a pencil, an eraser, and any paper. An HB pencil for construction lines and a 2B for final outlines is a nice upgrade, and colored pencils or markers finish it off — but nothing on this page requires special supplies.
Can kids draw Cinnamoroll?
Yes — Cinnamoroll is very manageable once you use construction shapes, and this method was written for first-timers. Kids can follow the same steps; just expect wobblier lines and more charm.