Candy Drawing: Step-by-Step Tutorial & Easy Ideas
Want to draw candy that actually looks right? Start with one basic geometric shape matched to the food and build from there. This page covers the full process — nine steps from first line to finished drawing — followed by candy drawing ideas in every style: easy, cute, realistic, and a few you probably haven't tried.
- Difficulty Easy
- Time ~10 min
- Tools Pencil, eraser, paper
- Starts with one basic geometric shape matched to the food
How to Draw Candy Step by Step
Step 1 of 9
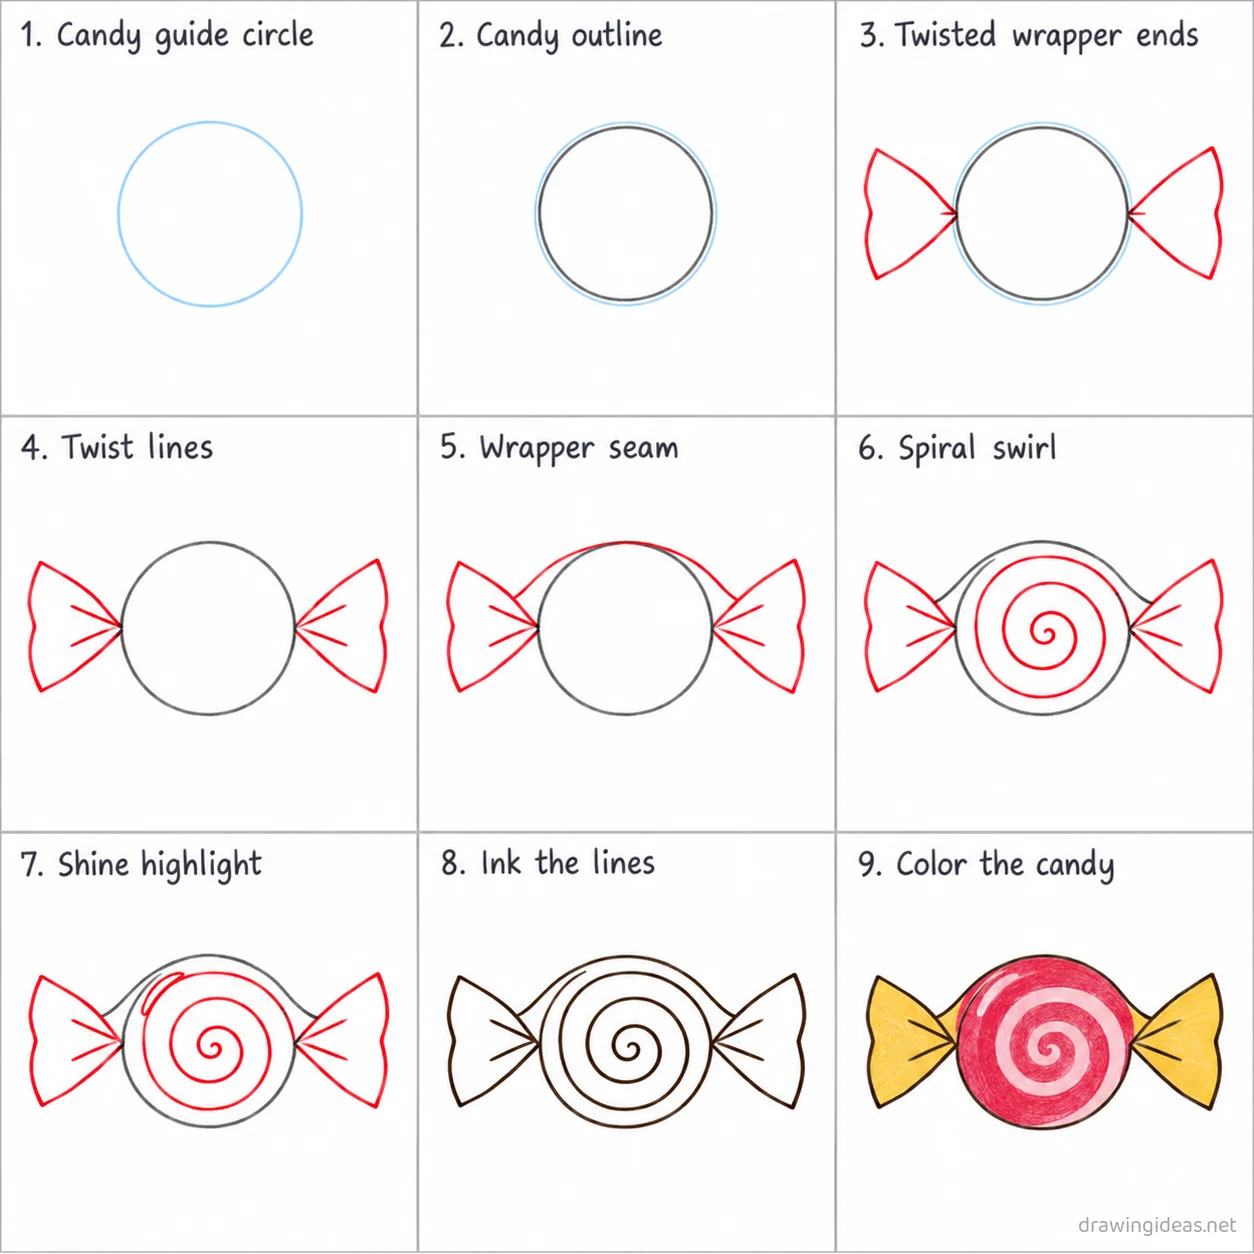
Candy guide circle
Draw one light circle in the middle of the page for the round candy body.
-
Candy guide circle
Draw one light circle in the middle of the page for the round candy body.
-
Candy outline
Trace the round candy outline directly on the guide circle.
-
Twisted wrapper ends
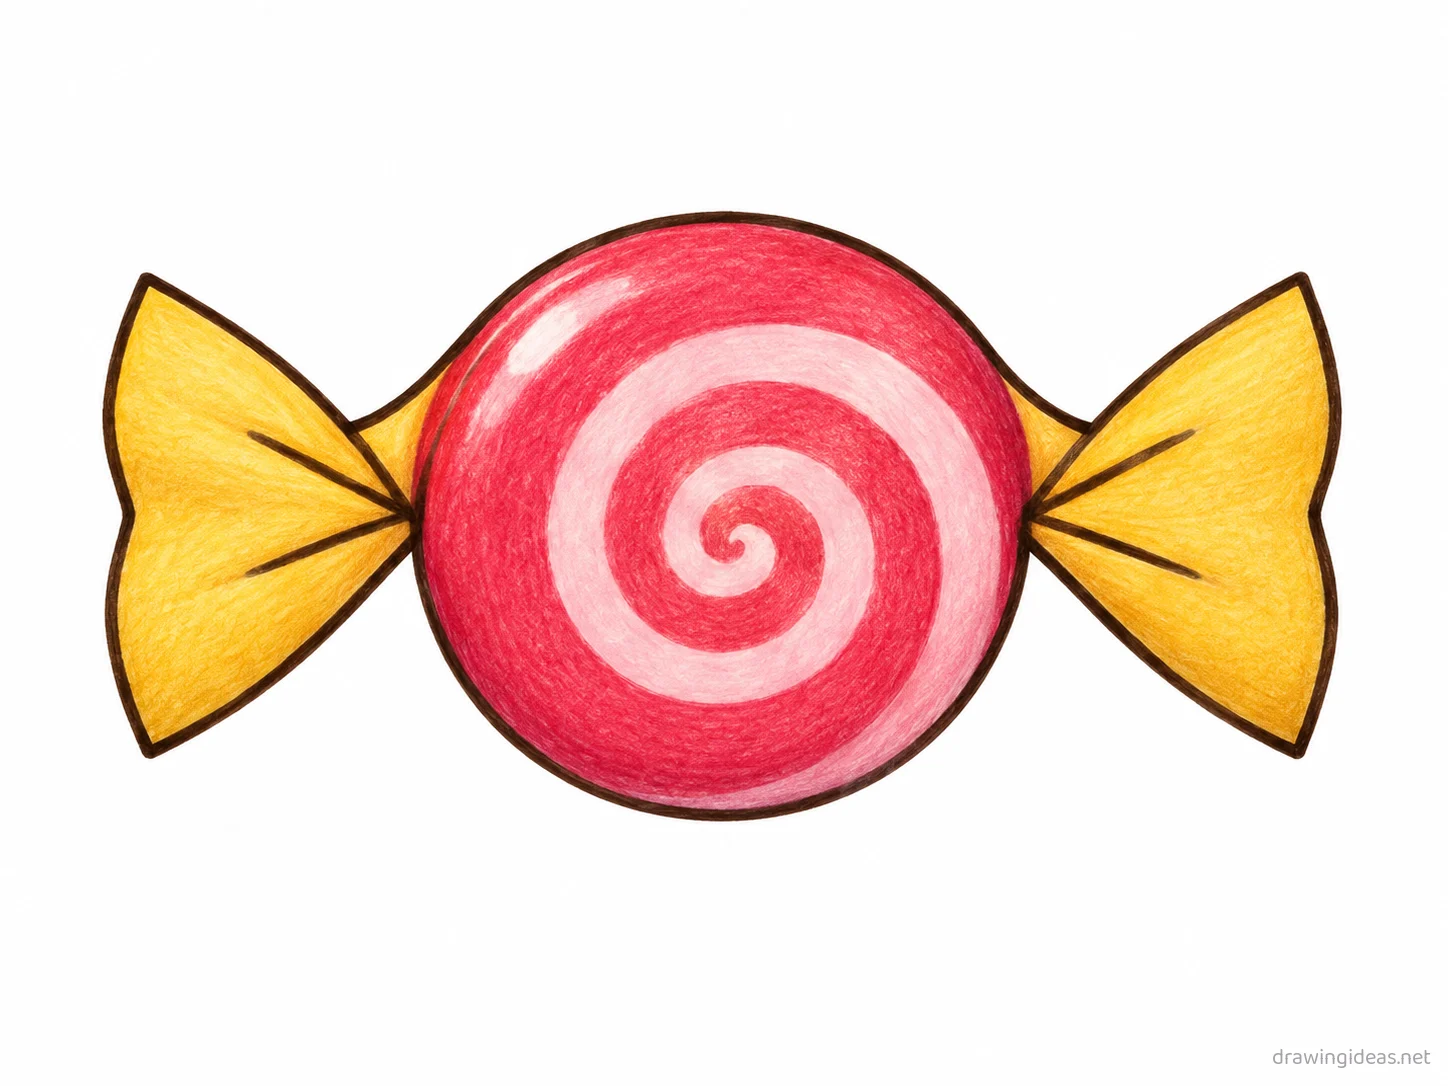
Draw a flared triangular wrapper end tapering to a twist on the left, and a matching one on the right.
-
Twist lines
Add a few short diagonal lines across each wrapper end to show the twisted paper.
-
Wrapper seam
Add a thin curved seam line across the top of the candy connecting the two wrapper ends.
-
Spiral swirl
Draw a spiral swirl line coiling out from the center of the candy toward its edge.
-
Shine highlight
Add one curved highlight streak on the upper left of the candy.
-
Ink the lines
Go over every kept line with dark ink, then erase the light candy guide circle.
-
Color the candy
Fill the candy body red, the swirl pale pink, and the wrapper ends bright yellow.
Candy Drawing Ideas to Try Next
Once the basic candy clicks, run it through these variations — each one practices a different skill while staying on a subject you already know.
-
A candy pattern grid
Repeat a simple candy in rows with alternating tilts — wrapping-paper energy, great pen practice.
-
A candy recipe-card illustration
The candy plus two or three ingredient doodles and hand-written labels — cookbook style.
-
Candy with a bite taken
Draw it damaged: one bite reveals the inside layers and makes it feel real.
-
A kawaii candy with a face
Dot eyes, pink cheeks, tiny smile — the cute-food formula that works on absolutely everything edible.
-
Candy street-food stand
A tiny cart or stand serving your candy, with a menu board and steam curls.
-
Floating deconstructed candy
Explode the layers vertically with gaps between them — the food-ad look, easier than it seems.
Tips for Better Candy Drawings
- Food needs one strong highlight to look fresh — a bright shine spot on the wettest or roundest surface. Matte food looks stale.
- Draw food slightly imperfect: a drip, a crumb, an uneven edge. Perfect food looks plastic; imperfect food looks delicious.
Not feeling candy today?
Let the generator pick your next subject — filtered by mood and difficulty.
🎲 Random Drawing GeneratorCandy Drawing FAQ
How do you draw candy easily?
Start with one basic geometric shape matched to the food, keeping your lines light. Refine the outline, add the defining details, then erase the construction shapes. The nine-step method above breaks this down — most people get a recognizable candy on their very first try with it.
How long does candy drawing take?
A simple candy drawing takes about 10 minutes following this tutorial. A quick doodle version can be done in two or three minutes, while a detailed, fully-shaded study might take an hour. Speed comes with repetition — the second attempt is always faster than the first.
What supplies do I need for candy drawings?
Just a pencil, an eraser, and any paper. An HB pencil for construction lines and a 2B for final outlines is a nice upgrade, and colored pencils or markers finish it off — but nothing on this page requires special supplies.
Is candy easy to draw for beginners?
Yes — candy is one of the friendlier subjects for beginners, and this method was written for first-timers. Kids can follow the same steps; just expect wobblier lines and more charm.