Backpack Drawing: Step-by-Step Tutorial & Easy Ideas
If you can draw a few basic boxes and cylinders, you can draw a backpack. That's genuinely the whole secret — the rest is knowing which lines to add in which order, and this tutorial shows you exactly that, step by step, before serving up a full list of backpack drawing ideas to practice with.
- Difficulty Easy
- Time ~12 min
- Tools Pencil, eraser, paper
- Starts with a few basic boxes and cylinders
How to Draw a Backpack Step by Step
Step 1 of 9
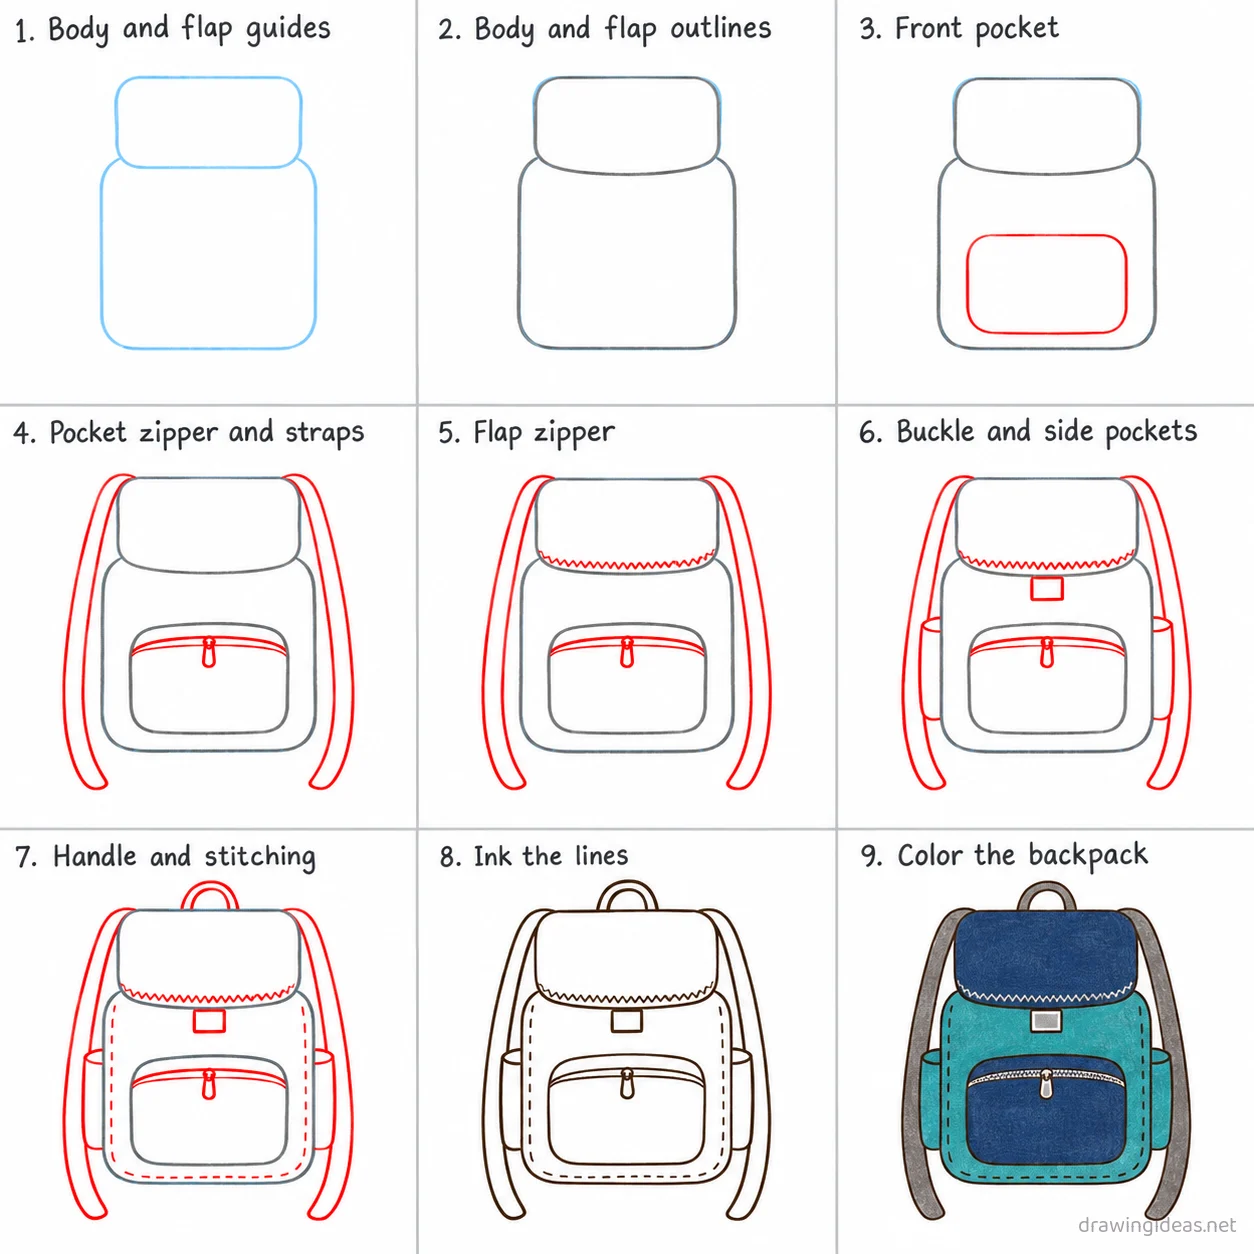
Body and flap guides
Draw a light rounded rectangle for the body in the middle of the page, then a smaller rounded rectangle above it for the flap.
-
Body and flap guides
Draw a light rounded rectangle for the body in the middle of the page, then a smaller rounded rectangle above it for the flap.
-
Body and flap outlines
Trace the body outline on the lower rectangle and the flap outline on the upper rectangle, joining where they overlap.
-
Front pocket
Draw a rounded rectangle pocket in the lower half of the body.
-
Pocket zipper and straps
Add a curved zipper line with a pull tab across the pocket top, then two curved straps hanging from the flap's top corners.
-
Flap zipper
Add a zigzag zipper line along the flap's bottom edge.
-
Buckle and side pockets
Add a small rectangle buckle just below the zipper, then a narrow pocket shape hugging each side edge of the body.
-
Handle and stitching
Add a small loop handle above the flap, then short dashed stitch lines just inside the body edges.
-
Ink the lines
Go over every kept line with dark ink, then erase the light body and flap guide rectangles.
-
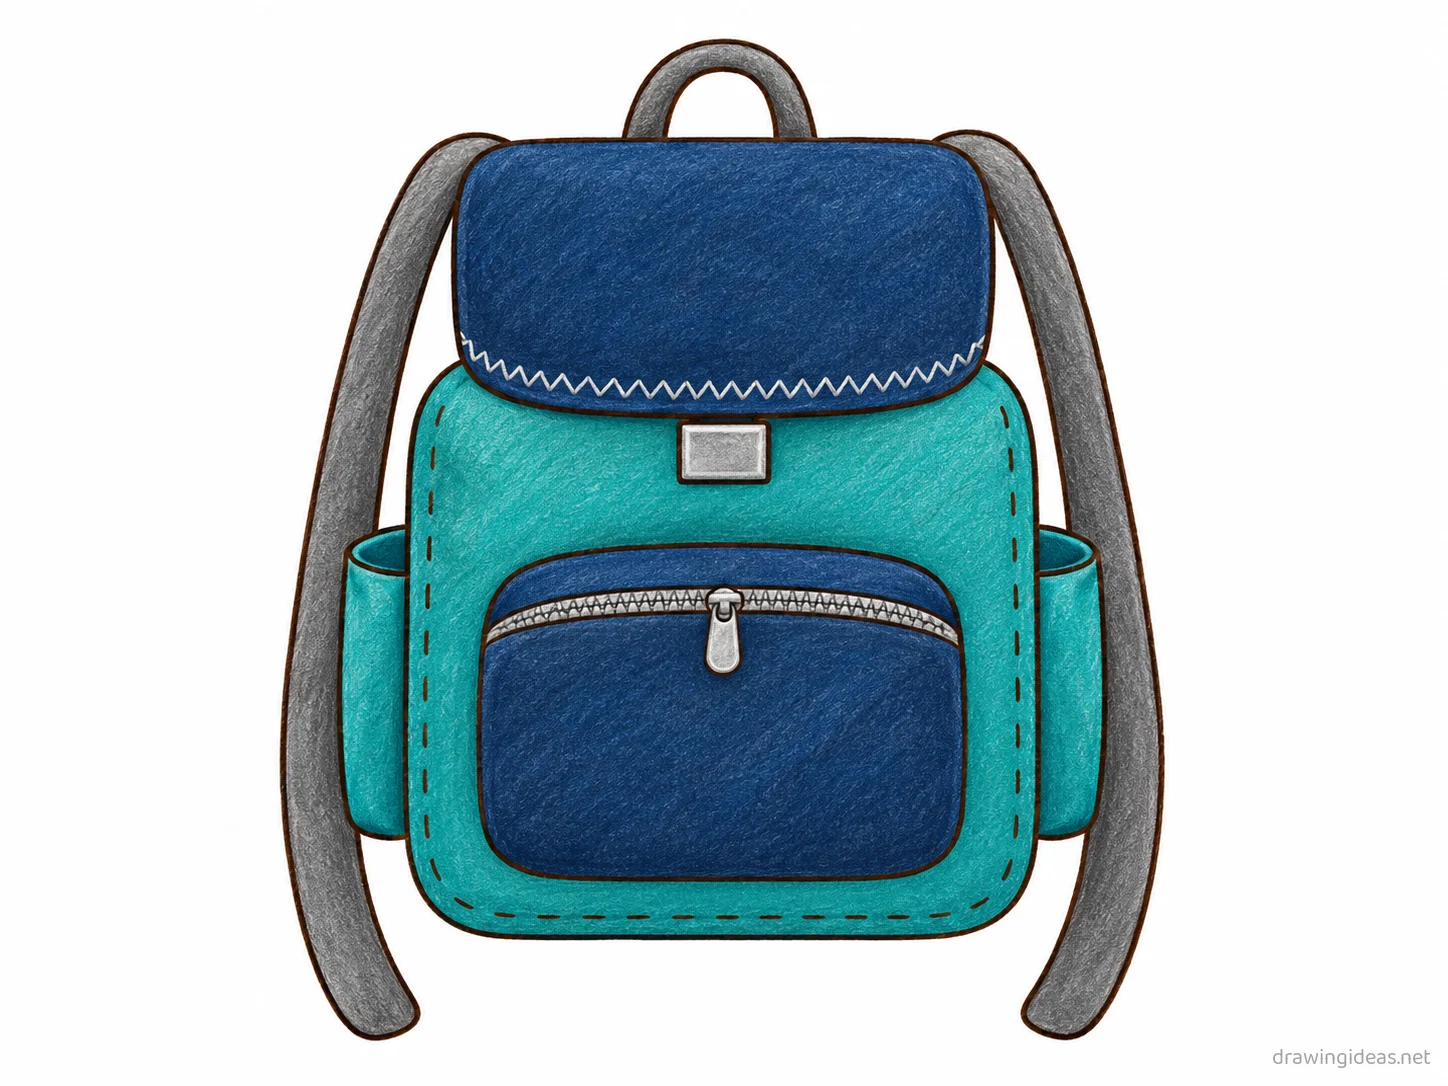
Color the backpack
Fill the main body teal, the flap and pocket navy blue, the straps gray, and the zippers and buckle silver.
Backpack Drawing Ideas to Try Next
Once the basic backpack clicks, run it through these variations — each one practices a different skill while staying on a subject you already know.
-
Cross-hatched vintage backpack
Render it in old-encyclopedia pen style: outlines plus patient parallel hatching.
-
An exploded view of a backpack
Separate the parts in mid-air like an instruction manual — deeply satisfying to draw and read.
-
A tiny backpack on a big empty page
Miniature drawing with deliberate negative space — composition as the artwork.
-
A worn, well-loved backpack
Add scratches, patches, and history — aged objects have stories new ones don't.
-
A backpack pattern sheet
Fill a page with the backpack at different angles and sizes — sticker-sheet style.
-
A backpack as a tiny house
Add a door and windows to the backpack as if someone tiny lives inside it.
Tips for Better Backpack Drawings
- Find the object’s basic solids first (box, cylinder, sphere) and get their proportions right before any detail — detail on wrong proportions is wasted work.
- A contact shadow grounds everything: a soft dark pool where the object meets the surface is the difference between sitting and floating.
Not feeling the backpack today?
Let the generator pick your next subject — filtered by mood and difficulty.
🎲 Random Drawing GeneratorBackpack Drawing FAQ
How do you draw a backpack easily?
Start with a few basic boxes and cylinders, keeping your lines light. Refine the outline, add the defining details, then erase the construction shapes. The nine-step method above breaks this down — most people get a recognizable backpack on their very first try with it.
How long should it take to draw a backpack?
A simple backpack drawing takes about 12 minutes following this tutorial. A quick doodle version can be done in two or three minutes, while a detailed, fully-shaded study might take an hour. Speed comes with repetition — the second attempt is always faster than the first.
What supplies do I need for backpack drawings?
Just a pencil, an eraser, and any paper. An HB pencil for construction lines and a 2B for final outlines is a nice upgrade, and colored pencils or markers finish it off — but nothing on this page requires special supplies.
Is a backpack easy to draw for beginners?
Yes — the backpack is one of the friendlier subjects for beginners, and this method was written for first-timers. Kids can follow the same steps; just expect wobblier lines and more charm.